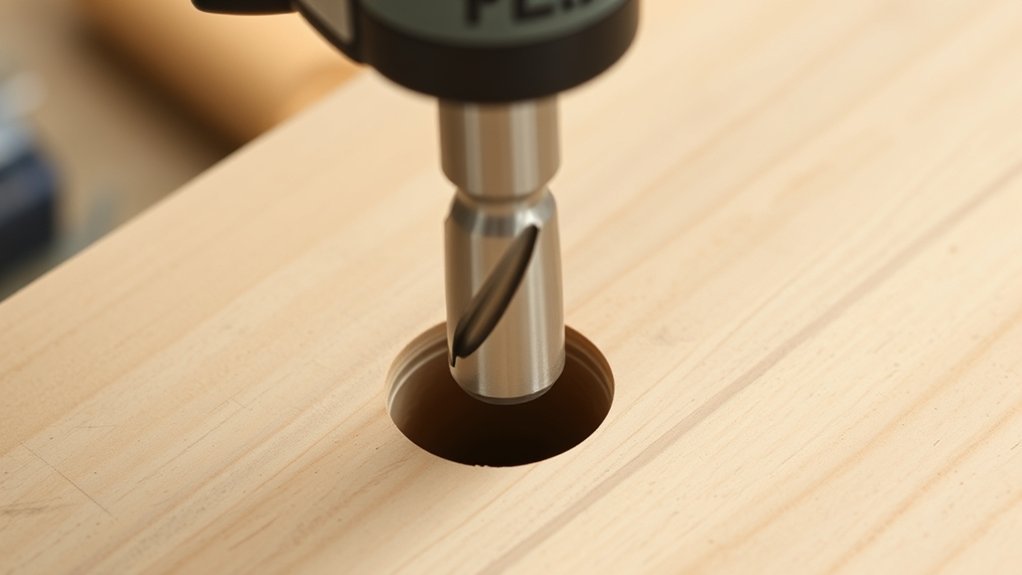
When you need screws to sit flush or below a surface, a countersink drill bit becomes essential. This specialized bit cuts a precise conical hole that matches the screw head’s shape, preventing protrusion and ensuring a smooth finish.
Understanding how a countersink drill bit works and when to use it can improve both your project’s durability and appearance.
But what specific types of countersink bits exist? And how do you choose the right one for your needs?
Exploring these questions will help you select the perfect bit for any woodworking or metalworking task.
What Is a Counter Sink Drill Bit and How Does It Work
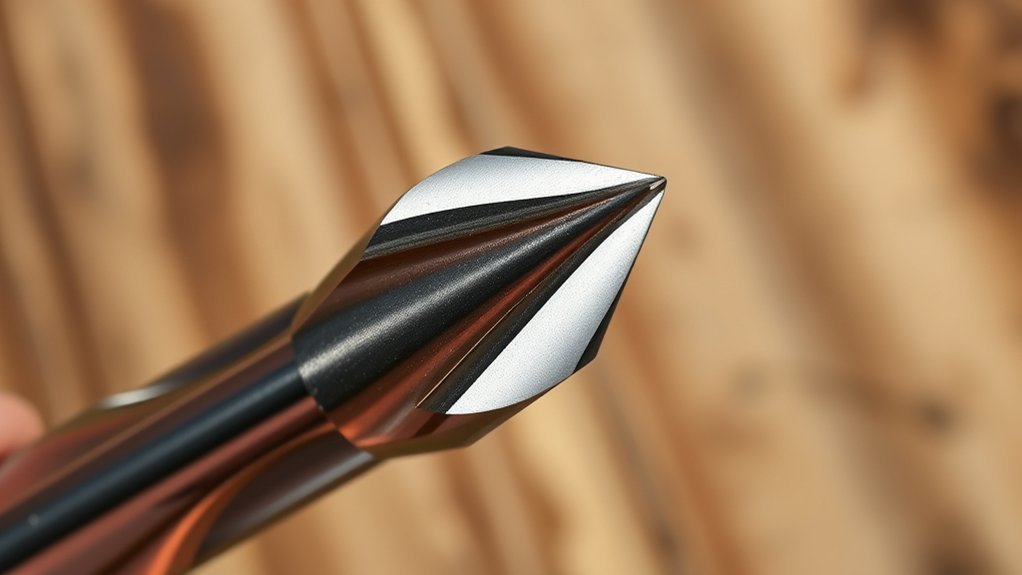
A countersink drill bit is a specialized cutting tool designed to create a conical hole that allows the head of a screw or bolt to sit flush with or below the surface of the material. You’ll find it essential for counter sink applications in woodworking, metalworking, and plastic fabrication, where precision is critical.
The drill bit’s geometry features angled cutting edges that remove material efficiently, ensuring a clean, tapered recess. Drill bit materials vary, typically including high-speed steel (HSS) for general use, cobalt for enhanced heat resistance, and carbide for durability in abrasive conditions.
Understanding these materials helps you select the right bit for your specific project, optimizing performance and longevity. Proper use guarantees that fasteners sit securely without protrusion, improving both aesthetics and structural integrity.
When Should You Use a Counter Sink Drill Bit?
You should use a counter sink drill bit when you need to prepare a clean seating for screw heads, ensuring they sit flush or below the surface. It’s essential for concealing screw heads to achieve a smooth finish.
It also enhances joint strength by allowing screws to tighten evenly. Understanding these applications helps you select the right tool for precise, professional results.
Preparing Screw Head Seating
Three critical scenarios call for using a countersink drill bit when preparing screw head seating: guaranteeing flush screw installation, preventing material splitting, and achieving a professional finish. You must control drill bit depth precisely to maintain ideal screw head alignment. Incorrect depth compromises seating and structural integrity.
| Scenario | Purpose | Key Consideration |
|---|---|---|
| Flush Installation | Align screw head with surface | Drill bit depth accuracy |
| Prevent Material Splitting | Avoid wood or plastic cracks | Proper countersink angle |
| Professional Finish | Enhance aesthetic and fit | Uniform seat depth |
Using a countersink drill bit guarantees consistent, precise seating for screws, critical in mechanical and woodworking projects demanding high accuracy and durability.
Concealing Screw Heads
When aiming to conceal screw heads effectively, employing a countersink drill bit becomes essential to create recessed seating that accommodates screw caps or filler materials. This technique guarantees that fasteners remain flush or below the material’s surface, facilitating a clean, uninterrupted surface finish.
Using countersink bits allows you to install concealed fasteners that enhance aesthetic appeal while protecting screw heads from environmental exposure. Precise countersinking is critical; insufficient depth can leave screw heads protruding, while excessive depth may weaken the surrounding material.
When you’re focused on achieving a polished surface finishing in woodworking, cabinetry, or metal fabrication, countersink drill bits provide the accuracy needed to maintain both function and form. Consequently, whenever concealed fasteners and seamless surface finishing are priorities, relying on a countersink drill bit is the best choice.
Improving Joint Strength
Although countersink drill bits are often associated with aesthetics, they play an essential role in improving joint strength by ensuring screws sit flush and distribute load evenly. Using a countersink bit enhances joint stability and contributes to the overall durability of your assembly.
You should consider using one when:
- You need to prevent uneven stress concentrations that can weaken joints.
- The application demands enhanced durability under dynamic or heavy loads.
- Precise screw seating is critical to maintaining structural integrity.
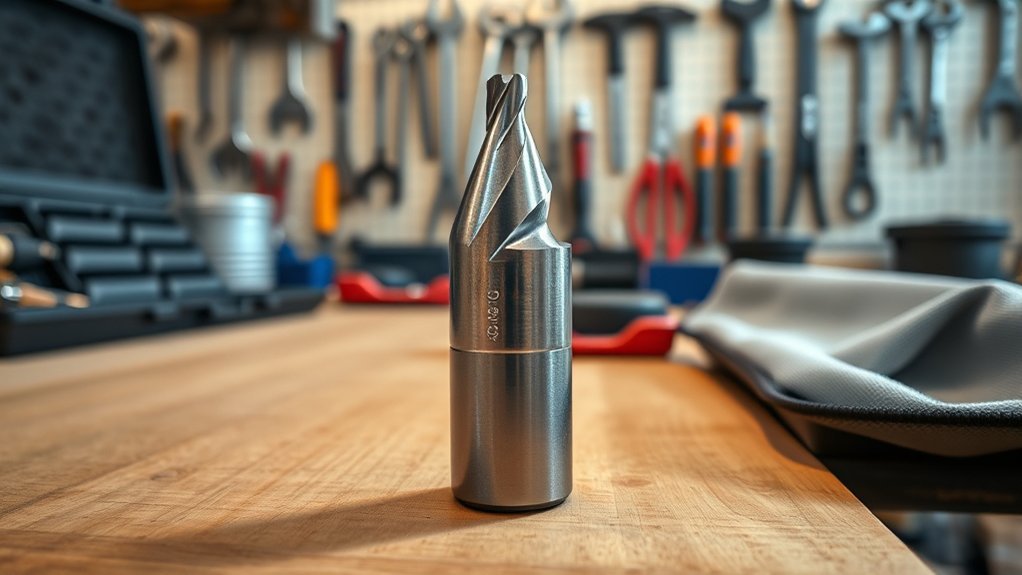
Types of Counter Sink Drill Bits
You’ll encounter several types of counter sink drill bits, each designed for specific applications. Flat bottom countersinks create a precise, flat seat for screws, while adjustable countersink bits let you control the depth for versatility.
Multi-flute countersinks offer smoother finishes and faster material removal, ideal for harder materials.
Flat Bottom Countersinks
Flat bottom countersinks provide a precise seating surface by creating a flat-bottomed recess for fasteners, ensuring uniform contact and load distribution. When you use these bits, you gain several flat bottom advantages:
- Enhanced stability: The flat base prevents fasteners from tilting, improving joint integrity.
- Consistent depth control: It allows for exact recess depth, critical in precision assemblies.
- Versatile flat bottom applications: Ideal for countersinking bolts, screws, and rivets in metal or wood where flush mounting is essential.
You’ll find flat bottom countersinks indispensable when working on projects requiring exact fastener seating without damaging the surrounding material. Their precise geometry suits both industrial and fine woodworking tasks, making them a specialized tool in your drilling arsenal.
Adjustable Countersink Bits
How can you achieve precise countersinking across various material thicknesses without changing tools? Adjustable countersink bits let you do just that by offering adjustable sizes that you can fine-tune for each application.
Unlike fixed countersinks, these bits feature a mechanism, often a collar or a sliding cutter, that allows you to control the diameter and depth of the countersink. This adaptability guarantees consistent results, especially when working with different screw sizes or material thicknesses.
Precision settings on these bits let you dial in the exact countersink dimensions, reducing trial and error and improving efficiency. By selecting the right adjustable countersink bit, you maintain tight tolerances and avoid over- or under-cutting, making them ideal for varied woodworking, metalworking, and plastic tasks requiring meticulous countersinking.
Multi-Flute Countersinks
When working with harder materials or requiring a smoother finish, multi-flute countersinks provide superior performance compared to single-flute designs. The multi-flute design enhances cutting efficiency by distributing the load among multiple cutting edges, reducing vibration and heat buildup. This allows you to achieve precise, clean countersinks with minimal burr formation.
Here’s why you should consider multi-flute countersinks:
- Increased cutting efficiency. Multiple flutes engage more material simultaneously, speeding up the process.
- Enhanced surface finish. The balanced cutting action results in smoother, more uniform countersink edges.
- Improved tool life. Reduced stress on each flute minimizes wear and prolongs bit durability.
Using multi-flute countersinks optimizes your workflow when working with metals or tough composites, ensuring professional results every time.
Choosing the Right Counter Sink Drill Bit
Why does selecting the appropriate countersink drill bit matter for your project? Choosing the right bit guarantees precise chamfering and prevents material damage. You must consider countersink materials and drill bit sizes to match your workpiece and screw specifications.
| Material Type | Recommended Bit Material | Typical Drill Bit Sizes (mm) | Application | Notes |
|---|---|---|---|---|
| Softwood | High-Speed Steel (HSS) | 6, 8, 10 | Furniture, cabinetry | HSS suffices for low abrasion |
| Aluminum | Carbide-Tipped | 8, 10, 12 | Metalworking | Carbide provides durability |
| Stainless Steel | Solid Carbide | 10, 12, 16 | Aerospace, automotive | Requires high hardness |
| Plastic | HSS or Cobalt | 4, 6, 8 | Prototype, electronics | Avoid excessive heat |
| Hardwood | Cobalt | 8, 10, 12 | Flooring, fine woodworking | Cobalt resists heat and wear |
How to Use a Counter Sink Drill Bit
To achieve a clean, accurate countersink, start by securely clamping your workpiece and selecting a drill speed appropriate for the material and bit type. Proper execution in countersink applications requires precision and control. Follow these steps:
Secure your workpiece and choose the correct drill speed for precise, clean countersinking results.
- Align the countersink bit perpendicular to the surface, guaranteeing stable contact with the pilot hole.
- Apply consistent, moderate pressure while drilling to prevent bit wandering and material damage.
- Frequently retract the bit to clear debris, maintaining bit sharpness and optimizing drill bit maintenance.
Adhering to these steps minimizes surface irregularities and guarantees countersink depth matches fastener requirements. Regular inspection and cleaning of the bit after use prolong its life and performance. By mastering these techniques, you enhance the efficiency and quality of your counter sink applications.
Common Mistakes to Avoid With Counter Sink Drill Bits
Successfully using a countersink drill bit depends on more than just proper technique; overlooking common errors can compromise your results. One frequent mistake is applying excessive pressure, which can cause bit overheating and premature dulling, undermining drill bit care.
You should also avoid using the wrong countersink technique, such as incorrect speed settings or angle alignment, since these lead to uneven countersinks or material damage. Another error is neglecting to secure the workpiece properly, resulting in slippage and inaccurate holes.
Additionally, failing to clear debris during operation can obstruct cutting efficiency and degrade finish quality. By understanding and avoiding these pitfalls, you’ll maintain precision and extend your bit’s lifespan, ensuring consistent, professional-grade countersinking outcomes.
Tips for Maintaining and Storing Counter Sink Drill Bits
Although countersink drill bits are designed for durability, proper maintenance and storage are essential to preserve their cutting efficiency and extend service life. For effective counter sink maintenance, follow these guidelines:
- Clean bits thoroughly after use to remove debris and prevent corrosion, using a solvent if necessary.
- Regularly inspect the cutting edges for wear or damage; sharpen or replace bits promptly to maintain precision.
- Store bits in a dedicated drill bit storage case or rack that prevents contact with other tools, minimizing damage and corrosion.
Conclusion
Now that you understand how a countersink drill bit works and when to use it, you’re ready to get the job done with precision. Choosing the right type and avoiding common pitfalls will guarantee your screw heads sit perfectly flush every time.
Remember, mastering this tool is not just about drilling holes—it’s about putting your best foot forward in craftsmanship and durability. Keep your bits sharp and stored properly to stay ahead of the curve.
In conclusion, using a countersink drill bit correctly ensures both functionality and aesthetics in your projects. This simple tool can make a significant difference in your woodworking and construction tasks.