Loading sandpaper into a palm sander is like fitting a key into a lock—if it’s not aligned perfectly, the tool won’t work smoothly. You’ll want to start by identifying the attachment type and ensuring the sander is powered off.
Skipping steps here can lead to uneven sanding or wasted material. Before you get the sandpaper in place, there are a few critical details you need to contemplate to avoid common pitfalls.
Choosing the Right Sandpaper for Your Palm Sander
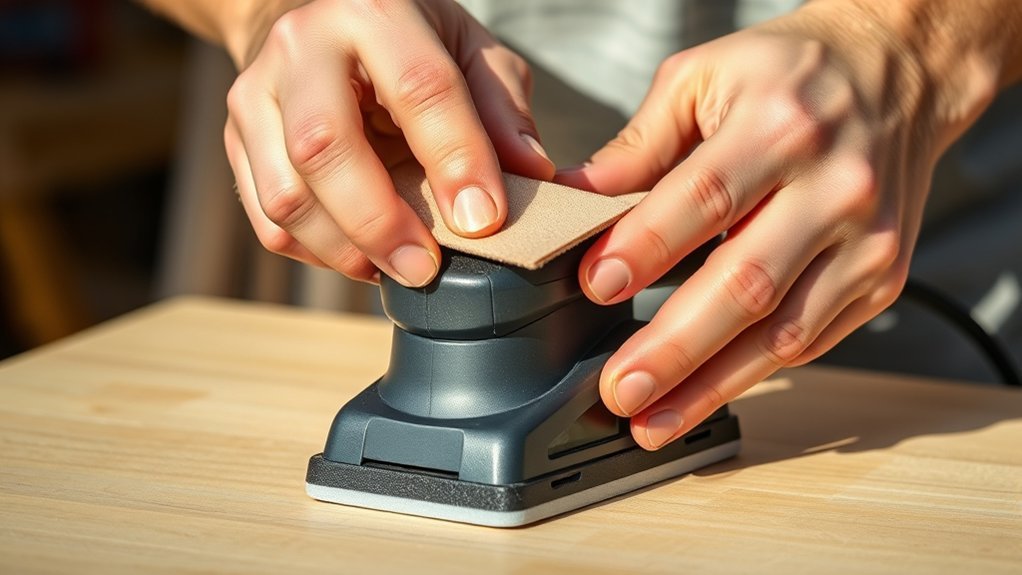
How do you choose the right sandpaper for your palm sander? First, check sandpaper compatibility with your sander. Most palm sanders use either hook-and-loop (Velcro) or adhesive-backed sheets.
Start by ensuring your sandpaper matches your palm sander’s attachment type—hook-and-loop or adhesive-backed.
Make sure the grit size matches your project. Use coarse grits (40-60) for heavy material removal, medium (80-120) for smoothing surfaces, and fine (150-220) for finishing touches.
Also, consider the sandpaper’s durability and material; aluminum oxide is versatile, while silicon carbide suits finer work. Proper sandpaper ensures efficient dust collection, as compatible sheets fit snugly, allowing the sander’s dust port to work effectively.
Using the right sandpaper prevents clogging and maintains performance, keeping your workspace cleaner. Always prioritize sandpaper designed for your sander model for the best results.
How to Get Your Palm Sander Ready
Preparing your palm sander properly sets the foundation for efficient sanding and a smooth finish. Before you start, don’t get distracted by unrelated topic details or off topic concerns. Focus solely on the sander itself.
Follow these steps to get your palm sander ready:
- Inspect the sander for any damage or worn parts to avoid disruptions.
- Unplug the tool to ensure safety while handling it.
- Clean the sanding pad to remove dust or debris that could affect performance.
- Check the dust collection system and empty or attach a bag if needed to keep the work area clean.
How to Attach Sandpaper to a Palm Sander
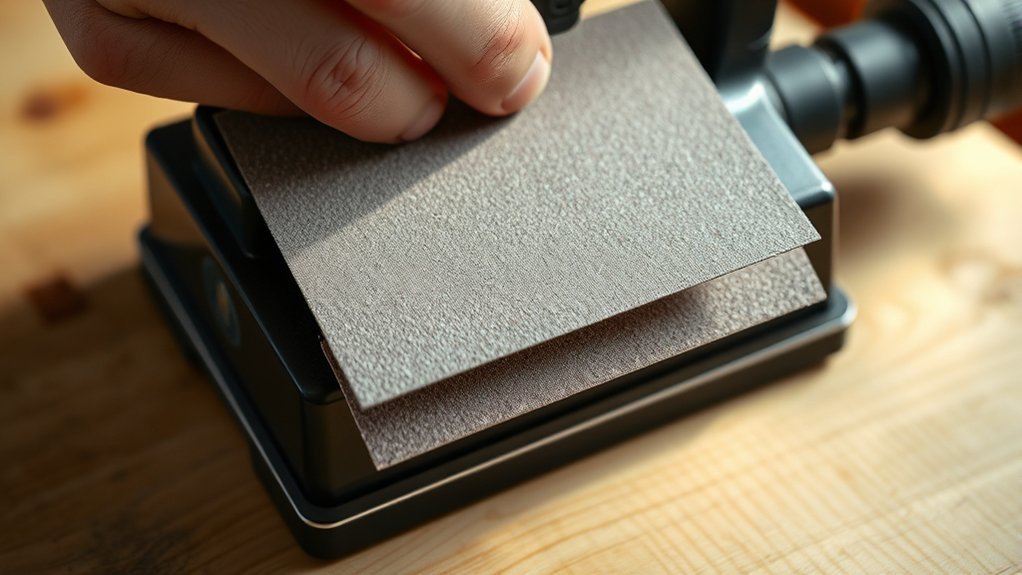
Once your palm sander is clean and ready, the next step is to securely attach the sandpaper. First, check the sandpaper compatibility with your sander model, ensuring the grit size and backing type match the sander’s specifications. Cut the sandpaper to the correct size if necessary. Align the sandpaper carefully over the sanding pad, making sure edges are flush and centered.
Most palm sanders use either a clamp system or hook-and-loop backing to hold the paper. When using clamps, insert the sandpaper under the clamp arms and tighten firmly to avoid grip failures during operation. With hook-and-loop systems, press the sandpaper firmly onto the pad, ensuring full contact to prevent slipping. Proper attachment is crucial for effective sanding and avoiding damage to the tool or work surface.
How to Secure Sandpaper to Prevent Slippage
To keep your sandpaper from slipping, start by choosing the right size that fits your palm sander perfectly. Use clamps or clips to hold the edges firmly in place, ensuring even tension across the surface.
Adjust the tension carefully so the sandpaper stays tight without tearing during use.
Choosing Proper Sandpaper Size
Selecting the right sandpaper size is essential for a secure fit on your palm sander, which prevents slipping during use. If the sandpaper is too large, it bunches up; too small, it won’t cover the pad properly.
Both situations reduce sanding efficiency and can damage your work, especially during drywall sanding or when aiming for an even orbital texture.
Follow these steps to choose the proper size:
- Measure your sander’s pad dimensions precisely.
- Cut sandpaper slightly larger than the pad to ensure full coverage.
- Avoid oversized sheets that fold or wrinkle during operation.
- Use manufacturer-recommended sizes for optimal fit and grip.
Using Clamps or Clips
How do you keep sandpaper firmly in place during sanding? Using clamps or clips is a reliable method to prevent slippage. First, check sandpaper compatibility with your palm sander’s clamp system—some models require specific clip sizes or types.
Align the sandpaper precisely over the sanding pad, then secure it by tightening the clamps or snapping the clips into position. Make sure the sandpaper lies flat without wrinkles to ensure even sanding.
While doing this, always wear gloves to protect your hands from sharp edges and abrasions. Glove safety is essential. Avoid overtightening clamps, which can tear the sandpaper.
Properly secured sandpaper reduces the risk of slipping and enhances sanding efficiency, giving you better control and a smoother finish.
Tension Adjustment Techniques
Once you’ve secured the sandpaper with clamps or clips, adjusting the tension properly prevents slippage during use. Without the right tension, the sandpaper might shift, impacting your finish quality.
Avoid getting distracted by unrelated topics or irrelevant discussion; focus strictly on these key techniques:
- Pull the sandpaper taut before locking the clamps to ensure even tension.
- Check both ends so neither is too loose or overly stretched, which can cause tearing.
- If your sander has a tension lever, adjust it incrementally and test for secure grip.
- After tensioning, run the sander briefly on a scrap piece to confirm the sandpaper stays in place.
Following these steps keeps your sandpaper steady, preventing slippage that can ruin your project.
How to Replace and Remove Sandpaper on a Palm Sander
To replace sandpaper on your palm sander, start by carefully peeling off the old sheet from the pad.
Next, align the new sandpaper evenly with the sander’s base to ensure full contact and smooth operation.
Finally, secure the paper firmly in place to prevent any slipping during use.
Removing Old Sandpaper
Where should you start when removing old sandpaper from your palm sander? First, avoid any unrelated topic or random chatter. Focus solely on the task. Follow these steps to remove the worn sandpaper efficiently:
- Unplug the sander to ensure safety before handling it.
- Locate the clamps or hook-and-loop fasteners holding the sandpaper.
- Release the clamps or peel off the sandpaper carefully to avoid tearing.
- Inspect the sanding pad for any remaining adhesive or debris and clean it if necessary.
Aligning New Sandpaper
After removing the old sandpaper and cleaning the sanding pad, you’re ready to align the new sheet. Start by placing the sandpaper on a flat surface, then position the palm sander’s sanding pad directly over it. Make sure the edges of the sandpaper match the edges of the pad precisely.
When aligning sandpaper, check that the holes in the sheet line up perfectly with the dust collection holes on the palm sander’s pad. Misaligned holes reduce dust extraction efficiency and can cause uneven sanding. Smooth out any wrinkles or folds in the sandpaper, ensuring it lays flat against the pad.
Properly aligning sandpaper prevents premature wear and improves sanding quality. Taking time to align the sandpaper correctly makes the sanding process smoother and more effective.
Securing Sandpaper Properly
Securing sandpaper properly guarantees it stays firmly in place during sanding, preventing slips that can damage your workpiece or the tool. When you replace or remove sandpaper on a palm sander, focus on these steps:
- Loosen the clamps or release the lever to remove old sandpaper.
- Align the new sandpaper edges with the sander’s base, avoiding any folds or wrinkles.
- Tighten the clamps or engage the lever firmly, ensuring the paper is taut.
- Double-check by gently pulling the edges; it shouldn’t shift or come loose.
Don’t get distracted by an unrelated topic or a random thought during this process. Precision here impacts your sanding quality and safety. Following these steps ensures your sandpaper stays secure, making your work efficient and clean every time.
Troubleshooting Common Sandpaper Loading Problems
Why won’t your sandpaper stay in place or lay flat on the palm sander? Start troubleshooting load by checking if the sandpaper size matches the sander’s base. If it’s too small or too large, it won’t secure properly.
Also, inspect the clamps or hook-and-loop system for damage or debris; clean or replace them if needed. Ensure you press the sandpaper firmly when attaching it to avoid wrinkles or bubbles.
If you notice the sandpaper peeling during use, confirm the surface is clean and dry before loading. Address these common sandpaper issues to improve adhesion and performance.
Frequently Asked Questions
What Safety Gear Should I Wear When Using a Palm Sander?
You should wear safety gloves, eye protection, noise reduction earplugs or earmuffs, and a dust mask. These keep your hands safe, protect your eyes, reduce hearing damage, and prevent inhaling harmful dust while sanding.
Can I Use Wet Sandpaper With a Palm Sander?
You might picture smooth, glistening grit, but using wet sandpaper on a palm sander’s vibrating surface isn’t safe or effective. Stick with dry sanding to avoid damage and assure consistent, quality results every time you work.
How Do I Clean My Palm Sander After Use?
To clean your palm sander, unplug it first. Use a brush or compressed air to remove dust from vents and pads.
Regular cleaning helps with dust management and keeps your sander running efficiently.
What Types of Surfaces Can a Palm Sander Be Used On?
You won’t want to miss how versatile palm sanders are; they handle wood, metal, plastic, and painted surfaces with ease.
Understanding palm sander suitability helps you select the right types of surfaces for smooth, efficient sanding results.
How Long Does Sandpaper Typically Last During Sanding?
Sandpaper typically lasts 20-60 minutes during sanding, but how long depends on the grit, material hardness, pressure applied, and speed.
You’ll notice it dulls faster on rough surfaces or with heavy, continuous use.
Conclusion
Now that you know how to load sandpaper onto your palm sander securely, you’re ready to tackle your project with the precision of a craftsman. Like a painter preparing a canvas, your careful preparation ensures smooth, flawless results.
Remember, attention to detail in loading prevents frustration later. Keep your sander clean, check attachments, and replace worn paper promptly. These steps turn a simple tool into your trusted partner for every sanding job.
Mastering how to load sandpaper into a palm sander not only improves your efficiency but also guarantees the best finish on your work.