Using a hand sander is like wielding a precision tool—your control directly shapes the finish. When learning how to use a hand sander, you’ll need to start by choosing the right sandpaper grit and setting up the sander properly to avoid scratches or uneven surfaces.
Understanding how to hold and move the tool ensures consistent results, but there’s more to mastering this process than just the basics. Let’s explore the essential steps that will help you work efficiently and safely.
Stay Safe When Using Your Hand Sander
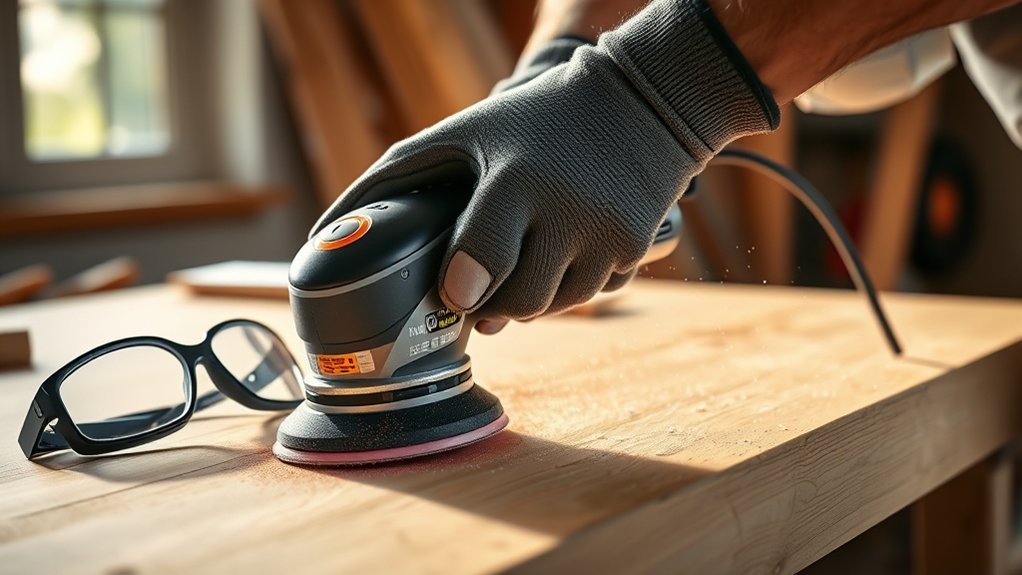
How do you guarantee safety when using a hand sander? First, follow essential safety reminders: always wear protective eyewear and a dust mask to prevent inhalation of particles. Ensure your workspace is well-ventilated and free of flammable materials.
Maintain a firm grip to avoid slipping, and disconnect the sander when changing sandpaper. Pay attention to hand sander ergonomics. Position your body to minimize strain, keep wrists straight, and use both hands to control the tool effectively.
Avoid forcing the sander; let its weight do the work. Regularly inspect the tool for damage or wear. By adhering to these safety reminders and optimizing hand sander ergonomics, you reduce risk and improve control, ensuring a safer, more efficient sanding process.
Choose the Right Hand Sander for Your Project
You’ll need to select a hand sander that matches your project’s surface and sanding requirements. Consider the type of sander, orbital, detail, or belt, and how its motion suits your task.
Also, decide between corded or cordless models based on your workspace and power needs.
Types of Hand Sanders
Which hand sander suits your project depends on the surface type, size, and desired finish. Understanding the types helps you avoid common myths, such as one sander fitting all tasks. Here’s a practical breakdown:
1. Orbital Sander
Ideal for smooth finishes on flat surfaces; it moves in small circles.
2. Detail Sander
Perfect for tight corners and intricate areas; its triangular pad accesses hard-to-reach spots.
3. Belt Sander
Best for heavy material removal on large, flat surfaces; it’s aggressive and fast.
4. Sheet Sander
Uses rectangular sandpaper; good for light sanding and finishing tasks.
This how-to guidance ensures you select the right tool, optimizing efficiency and finish quality without unnecessary effort or tool misuse.
Project Surface Considerations
Evaluating the surface you’ll be working on is the first step in choosing the right hand sander. Consider the material type, wood, metal, or drywall, as each demands specific abrasive grits and sander types for efficient surface prep.
For rough surfaces or heavy material removal, a belt sander delivers aggressive sanding, while orbital sanders excel at fine finishing on smooth surfaces. Assess the surface area size; larger areas benefit from wider sanding pads to reduce work time.
Additionally, factor in dust control features. Sanders with built-in dust collection systems help maintain a clean workspace and improve visibility during sanding. Selecting a sander with appropriate dust control is essential for health and precision.
Power Source Options
Selecting the right power source for your hand sander directly impacts its performance and convenience during your project. You’ll need to balance mobility, power, and runtime to match your sanding tasks effectively.
Here are four common power source options:
- Corded Electric: Provides continuous power with no battery life concerns, ideal for long, intensive sanding jobs.
- Cordless (Battery-Powered): Offers portability and ease of use, but monitor battery life closely to avoid interruptions.
- Pneumatic (Air-Powered): Requires an air compressor, delivering consistent power but limiting mobility.
- Manual (Hand-Powered): No power source needed; suitable for small, detailed work without electrical dependency.
Choose a power source that aligns with your project’s scope and workspace constraints for optimal results.
Pick the Best Sandpaper Grit for Your Hand Sander
How do you determine the right sandpaper grit for your hand sander? Start by checking sandpaper compatibility with your specific sander model. Ensure the backing type and size match.
Use coarse grits (40-60) for heavy material removal or stripping paint. Medium grits (80-120) smooth rough surfaces, while fine grits (150-220) prepare wood for finishing.
Employ a proper grit progression to avoid scratches and achieve a uniform surface: begin with coarse grit to remove imperfections, then systematically move to finer grits for smoothness. Avoid skipping multiple grit steps, as it compromises the finish quality.
Selecting the correct grit based on your project needs and sander compatibility optimizes efficiency and results, preventing damage to both the tool and material.
Set Up Your Hand Sander Correctly and Safely

Once you’ve chosen the appropriate sandpaper grit for your project, the next step is to set up your hand sander for safe and effective operation. Proper setup maximizes performance and minimizes hazards. Focus on these key steps:
- Inspect the hand sander design to ensure all components, including the pad and handle, are secure and undamaged.
- Attach the sandpaper firmly, aligning it with the base to prevent slipping during use.
- Connect the dust collection system if your sander supports it; this reduces airborne particles and keeps the workspace clean.
- Plug in or charge the sander, checking the power source for stability and ensuring the cord or battery doesn’t obstruct your movements.
Following these steps helps you maintain control and safety throughout sanding.
Hold and Move Your Hand Sander for Even Finishing
Hold the sander firmly with both hands to maintain control and reduce vibration. Move the sander in steady, overlapping strokes to achieve an even finish without gouging the surface.
Keep your pressure consistent to avoid uneven sanding marks.
Proper Grip Techniques
A secure grip on your hand sander guarantees control and consistent pressure, which are essential for an even finish. Focus on grip ergonomics to reduce fatigue and improve accuracy. Proper palm positioning stabilizes the sander and prevents uneven sanding.
Follow these steps for an optimal grip:
- Place your palm flat on the sander’s top handle, ensuring even pressure distribution.
- Wrap your fingers firmly but not tightly around the front grip for enhanced control.
- Maintain a relaxed wrist to allow natural hand movement without strain.
- Adjust your grip as needed to keep the sander flush with the surface, avoiding tilting.
Consistent Sanding Motion
How should you move your hand sander to achieve an even finish? Maintain a consistent motion by holding the sander firmly but without excessive pressure. Use smooth strokes, moving the sander evenly across the surface to avoid gouges or uneven sanding.
Overlap each pass slightly to ensure full coverage. Keep your hand steady and let the sander’s weight do the work rather than forcing it. Avoid pausing too long in one spot to prevent uneven sanding marks or burns.
Use a controlled speed and steady pace, adjusting as needed for different materials. By combining these techniques—consistent motion, smooth strokes, and controlled pressure—you’ll achieve a uniform surface ready for the next finishing step.
Sand Different Surfaces Step-by-Step

Where should you begin when sanding various surfaces with a hand sander? Start by understanding the appropriate sanding techniques and thorough surface preparation for each material. Follow these steps to ensure effective, even sanding:
- Wood: Begin with coarse grit to remove imperfections, then progress to finer grits for a smooth finish.
- Metal: Use a medium grit to eliminate rust or paint, followed by a finer grit to polish the surface.
- Drywall: Sand gently with fine grit to smooth joints and avoid damage.
- Painted surfaces: Start with a fine grit to avoid stripping the paint and adjust grit based on surface condition.
Avoid Common Sanding Mistakes Like Scratches and Uneven Finishes
Why do scratches and uneven finishes often appear during sanding? They usually result from improper pressure, inconsistent motion, or clogged abrasive surfaces.
To avoid these issues, maintain proper hand sander ergonomics: hold the tool firmly but relaxed to ensure even pressure distribution. Move the sander in smooth, overlapping strokes, never staying too long in one spot.
Dust control is crucial. Clogged sandpaper causes uneven abrasion and scratches. Use a vacuum attachment or blow dust away frequently to keep the sanding surface clean.
Also, regularly check and replace worn abrasive pads to prevent gouging. By focusing on consistent motion, balanced pressure, and effective dust control, you’ll minimize common mistakes and achieve smooth, uniform finishes without scratches or unevenness.
Clean and Prepare Surfaces After Hand Sanding
Once you’ve maintained consistent pressure and kept the sanding surface clean, the next step is to thoroughly clean and prepare your workpiece. Proper surface prep ensures the best adhesion for finishes and eliminates imperfections caused by debris. Focus on debris removal to avoid contaminating your project.
Follow these steps:
- Use a vacuum or brush to remove loose dust and sanding residue from the surface.
- Wipe the workpiece with a tack cloth or a damp microfiber cloth to capture fine particles.
- Inspect the surface under good lighting for missed spots or rough areas.
- Lightly sand any remaining imperfections with fine-grit sandpaper, then repeat debris removal.
This methodical cleaning and preparation stage is crucial for achieving a smooth, defect-free finish.
Maintain Your Hand Sander and Replace Sandpaper on Time
How often should you check your hand sander’s condition to ensure optimal performance? Establish a consistent maintenance scheduling routine, ideally before and after each use. Inspect the sanding pad for wear, and replace sandpaper promptly when it loses grit or becomes clogged.
Proper sandpaper storage is crucial. Keep sheets flat, dry, and away from direct sunlight to preserve abrasiveness and prevent warping. During maintenance, clean dust from vents and moving parts to avoid overheating and mechanical failure.
When changing sandpaper, ensure it adheres firmly to avoid uneven sanding or damage. By adhering to these precise steps, you’ll extend your sander’s lifespan and maintain efficiency, ensuring your projects finish smoothly without unnecessary delays or tool malfunctions.
Troubleshoot and Care for Your Hand Sander Long-Term
Regular maintenance and timely sandpaper replacement set the foundation for your hand sander’s performance, but addressing issues promptly guarantees it stays reliable over time. To maximize hand sander durability and efficiency, follow these steps:
Timely maintenance and prompt problem-solving keep your hand sander reliable and efficient for years to come.
- Inspect the sanding pad regularly for wear or damage; replace it to maintain consistent sanding pressure.
- Clean the dust collection system after each use; clogged filters reduce suction and sanding effectiveness.
- Check the motor and electrical connections periodically to prevent unexpected failures; tighten loose parts as needed.
- Lubricate moving parts according to the manufacturer’s guidelines to reduce friction and extend tool life.
Implementing these dust collection tips and troubleshooting measures ensures your hand sander performs optimally, saving you time and repair costs in the long run.
Frequently Asked Questions
Can I Use a Hand Sander for Metal Surfaces?
Yes, you can use hand sanding on metal surfaces, but you’ll need specific abrasives designed for metal compatibility. Choose sandpaper grit suitable for metal, apply consistent pressure, and avoid overheating to prevent surface damage during hand sanding.
What Is the Average Lifespan of a Hand Sander?
The average lifespan of a hand sander is typically 5 to 10 years. You’ll extend it by regularly cleaning dust, checking for worn parts, and lubricating moving components as maintenance tips to ensure optimal performance.
Are Cordless Hand Sanders as Effective as Corded Ones?
Cordless vs corded hand sanders differ mainly in power source. You’ll find corded models generally deliver more consistent power, but cordless ones offer better portability.
Choose based on your project’s power needs and work environment.
Can I Use Water to Reduce Dust When Sanding?
You can use water to reduce dust when sanding, but “don’t put all your eggs in one basket.” Wet sanding controls dust effectively but requires waterproof sandpaper and caution to avoid damaging surfaces or tools.
How Much Noise Does a Hand Sander Typically Produce?
You’ll find hand sander noise levels typically range between 70-90 decibels. Using dust reduction attachments or vacuum systems not only minimizes airborne particles but also can slightly dampen sound, making your sanding quieter and cleaner.
Conclusion
By staying safe, choosing the right sander and grit, and setting up your tool properly, you ensure effective sanding every time. Hold and move the sander with steady, even pressure, avoid common mistakes, and clean surfaces thoroughly.
Maintain your sander regularly, replace sandpaper promptly, and troubleshoot issues quickly. Follow these steps consistently, work smartly, and care diligently to achieve professional results.
By doing so, you will enhance your work quality and extend your hand sander’s life, making the most of your hand sander every time you use it.