Coincidentally, the size of the drill bit you choose for your Ring Doorbell installation can make or break the entire process.
Selecting the correct drill bit size is crucial because using the wrong diameter may damage your wall or result in an insecure doorbell mount.
To get it right, you need to match the drill bit precisely to the mounting screws and the surface material you are working with.
Before you start drilling, consider these technical factors carefully to ensure a clean and stable fit.
Taking the time to choose the appropriate drill bit size will save you from potential installation headaches and help your Ring Doorbell stay firmly in place.
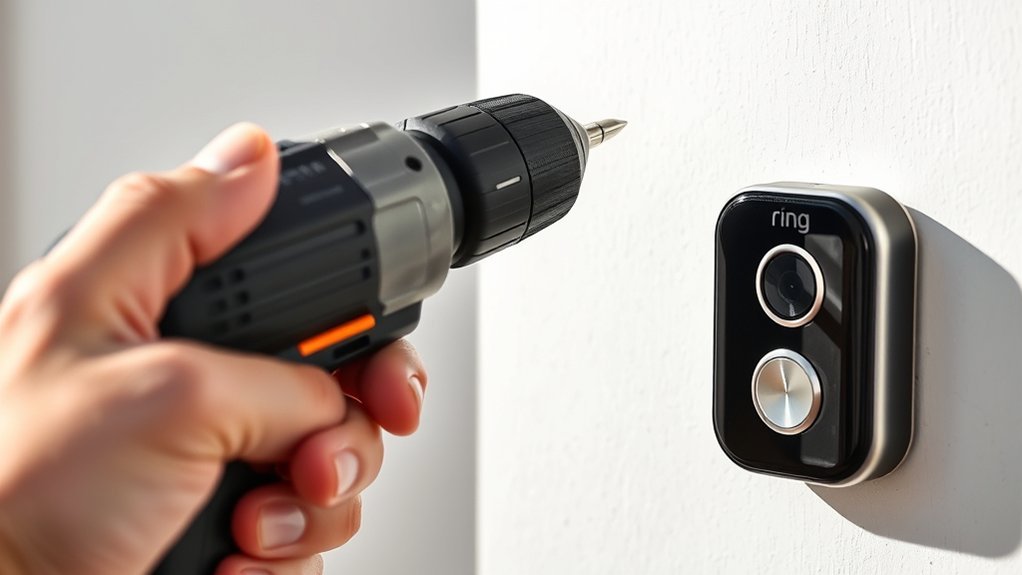
What Size Drill Bit Does a Ring Doorbell Need?

When installing a Ring Doorbell, you’ll need a drill bit that matches the size of the mounting screws and anchors. Choosing the correct drill bit type is essential. Typically, use a masonry bit for brick or concrete and a standard twist bit for wood or drywall.
The drill bit diameter should slightly exceed the screw’s core thickness to guarantee a snug fit without splitting the material. For plastic anchors, match the bit size to the anchor’s outer diameter for secure placement.
Installation tips include verifying the surface material before selecting the bit and testing the hole size with a screw pilot to avoid re-drilling. Using the right drill bit type and size guarantees a stable, lasting installation of your Ring Doorbell.
Matching Drill Bit Size to Your Ring Doorbell Screws
Selecting the correct drill bit size hinges on matching it precisely to your Ring Doorbell screws. Using the right drill bit material is essential to avoid damaging screws or mounting surfaces. Here’s how to match drill bits to screw types effectively:
Choosing the right drill bit size and material ensures secure installation and prevents damage to screws and surfaces.
- Identify the screw type, typically Phillips or Torx for Ring Doorbells.
- Measure the screw shaft diameter, not including threads, to determine pilot hole size.
- Choose a drill bit made from materials like high-speed steel or carbide for durability.
- Select a drill bit diameter slightly smaller than the screw’s outer thread diameter to guarantee tight anchoring.
Measuring Your Mounting Holes to Pick the Right Drill Bit

Start by measuring the diameter of your mounting holes accurately using a caliper or ruler. This measurement helps you select a drill bit that fits snugly without damaging the wall.
Matching the drill bit size to the hole diameter guarantees a secure and stable installation for your Ring Doorbell.
Measuring Hole Diameter
Accurately measuring your mounting holes guarantees you choose the correct drill bit size for your Ring Doorbell installation. Begin by selecting precise measuring tools such as calipers or a ruler with millimeter markings.
Verify hole alignment on the mounting bracket matches your wall markings before measuring. Follow these steps to measure hole diameter effectively:
- Clean the hole edges to avoid inaccurate readings.
- Use calipers to measure the internal diameter of each mounting hole.
- Record measurements for all holes, noting any size variations.
- Confirm hole alignment with your mounting template for consistency.
Matching Drill Bit Size
Choosing the correct drill bit size hinges on the exact measurements of your mounting holes. First, measure the hole diameter accurately using calipers or a drill gauge. Match this measurement to a drill bit that fits snugly but doesn’t widen the hole excessively.
Consider the screw types provided with your Ring Doorbell; wood screws require slightly smaller pilot holes than masonry screws. Additionally, select drill bits made from appropriate drill bit materials. Carbide or diamond-tipped bits work best for brick or concrete, while high-speed steel bits suit wood or drywall.
Using the correct drill bit size guarantees secure mounting without damaging the wall or screws. Always double-check measurements and material compatibility before drilling to achieve a perfect, durable installation.
How to Choose the Right Drill Bit Size for Wood, Brick, and Drywall
When drilling for a Ring Doorbell, you’ll need to match the drill bit size precisely to the mounting hardware and surface material. Different drill bit types suit wood, brick, and drywall, so selecting the right one guarantees a secure installation. Follow these installation tips:
Matching drill bit size to your surface and hardware ensures a secure, hassle-free Ring Doorbell installation.
- For wood, use a standard twist bit slightly smaller than the screw diameter to prevent splitting.
- For brick or masonry, opt for a carbide-tipped masonry bit matching the anchor size.
- For drywall, a regular twist bit equal to the screw size works, but avoid oversizing to maintain grip.
- Always verify the Ring Doorbell’s included screws and anchors, then choose a drill bit that matches or slightly undercuts their diameter.
This approach assures a firm fit and avoids common drilling errors.
How the Wrong Drill Bit Size Can Damage Your Ring Doorbell
Matching the drill bit size to your Ring Doorbell’s screws and anchors guarantees a secure installation, but using the wrong size can cause significant damage. If your drill bit is too large, it creates oversized holes, weakening the mounting strength and risking the doorbell’s stability.
Conversely, a drill bit that’s too small forces screws into tight spaces, potentially cracking the doorbell’s mounting bracket or stripping screws. Both scenarios undermine your device’s durability and functionality.
To avoid these issues, adhere strictly to installation precautions: verify the exact drill bit size recommended by Ring and confirm compatibility with your wall material. Taking these steps guarantees a precise fit that protects your Ring Doorbell from mechanical stress and promotes long-term reliability.
How to Drill Pilot Holes to Prevent Wall Damage
Although drilling pilot holes might seem straightforward, doing it correctly is essential to prevent wall damage and guarantee a stable installation for your Ring Doorbell. Applying proper pilot hole techniques tailored to your wall material considerations minimizes cracking and secures precise screw placement.
Follow these steps:
- Choose a drill bit slightly smaller than the screw diameter to optimize grip without splitting the wall.
- Mark the exact screw locations using a pencil or template to maintain alignment.
- Drill slowly at a perpendicular angle to avoid enlarging the hole or damaging the surface.
- Clear debris from the hole before inserting screws to ensure secure fastening.
Tips for Drilling Into Brick and Masonry
When drilling into brick or masonry, use a carbide-tipped masonry bit sized to your anchor or screw. Apply steady pressure without forcing the drill, and start with a slow speed to maintain control.
Make certain to clear dust frequently to guarantee a clean, accurate hole.
Selecting Masonry Drill Bits
Since drilling into brick and masonry requires specialized tools, selecting the right masonry drill bit is essential for clean, efficient holes. Your choice directly affects drilling speed, bit durability, and hole accuracy.
Use a masonry drill bit designed with a tungsten carbide tip for hardness and longevity. Confirm the drill bit matches the diameter needed for your ring doorbell’s anchors or screws.
Consider the drill bit length; it must penetrate the masonry deeply enough without excessive length that hinders control. Keep these factors in mind:
- Choose a carbide-tipped masonry drill bit for durability.
- Match the drill bit diameter to anchor or screw size.
- Select a length suitable for wall thickness.
- Use a drill bit compatible with your masonry drill’s chuck size.
This precise selection reduces breakage and confirms proper fit.
Using Proper Drilling Techniques
Before you start drilling into brick or masonry, you’ll want to confirm your drill is set to the hammer mode to efficiently penetrate the tough surface. Secure the drill bit firmly and mark your drilling spot accurately. Use a masonry drill bit sized appropriately for your anchor or screw.
Apply steady, moderate pressure. Too much force risks damaging the wall materials or breaking the bit. Keep the drill perpendicular to the wall for a clean, precise hole.
Periodically withdraw the bit to clear dust and debris, maintaining drilling efficiency. Always wear safety goggles and gloves to uphold drilling safety standards.
Ascertain the area behind the wall is clear of wiring or plumbing before drilling. Following these techniques will help you install your Ring Doorbell securely and avoid unnecessary damage.
Best Drill Bit Types for Ring Doorbell Installation
Choosing the right drill bit is essential for a secure and efficient Ring Doorbell installation. Selecting drill bit materials that match your mounting surface guarantees clean holes and prevents damage.
Selecting the correct drill bit ensures clean holes and a secure Ring Doorbell installation without damaging your mounting surface.
Here are the best drill bit types for common installation scenarios:
- High-Speed Steel (HSS) Bits – Ideal for wood and soft plastics; durable and affordable.
- Carbide-Tipped Bits – Perfect for masonry, brick, or concrete walls.
- Titanium-Coated Bits – Provide extra durability for metal or harder materials.
- Brad Point Bits – Offer precise entry and clean holes in wood, reducing splintering.
Use these installation tools to match your surface type, guaranteeing secure mounting and avoiding unnecessary wear on your drill bits. Proper selection minimizes installation issues and prolongs tool life.
Using a Drill Guide or Template for Accurate Hole Placement
You’ll guarantee precise hole alignment by using a drill guide or template during installation. These tools help maintain stability and prevent misplacement, which is essential for mounting your Ring Doorbell correctly.
Choose a template that matches your doorbell model to streamline the drilling process and avoid errors.
Benefits of Drill Guides
Although drilling holes for your Ring Doorbell might seem straightforward, using a drill guide or template guarantees precise alignment and accurate hole placement. The drill guide advantages streamline the installation, ensuring you avoid misaligned holes that can compromise mounting stability.
Precision drilling reduces the risk of damaging the wall or device. Here are four key benefits you’ll gain:
- Consistent hole spacing and depth for secure mounting
- Minimized wall damage by preventing drill bit slippage
- Faster installation with fewer measurement errors
- Enhanced aesthetic results due to perfectly aligned holes
Choosing the Right Template
Selecting the right template guarantees your drill holes align perfectly with your Ring Doorbell’s mounting brackets. When choosing templates, prioritize those designed specifically for your model to guarantee compatibility.
Use templates that clearly mark hole positions, reducing guesswork and errors. Before drilling, verify the template’s placement using a level and measure twice to confirm accuracy.
Secure the template firmly to prevent shifting during drilling. Measuring accuracy is critical; even slight misalignments can cause mounting issues or damage to surfaces.
If your template includes pilot holes for smaller drill bits, start there to maintain precision. By carefully choosing templates and emphasizing measuring accuracy, you’ll achieve clean, precise holes that facilitate a secure, professional installation of your Ring Doorbell.
Troubleshooting Common Drilling Issues
When drilling for your Ring Doorbell, encountering issues like bit slippage, misalignment, or material resistance can disrupt your installation. To avoid these common pitfalls, first assess the wall material carefully. Different surfaces require specific drill bits and techniques. Here’s how to troubleshoot drilling issues:
Avoid drilling issues by assessing your wall material and using the right drill bits and techniques for a smooth installation.
- Use a pilot hole to prevent bit wandering on smooth or hard surfaces.
- Secure the drill template firmly to maintain alignment.
- Select a drill bit compatible with your wall material: masonry bits for brick or concrete, wood bits for timber.
- Apply steady, moderate pressure; excessive force can damage both bit and wall.
Addressing these factors guarantees precise holes, preventing damage and improving your Ring Doorbell’s mounting stability.
Conclusion
Choosing the correct drill bit size is essential for a clean, confident, and consistent Ring Doorbell installation. By balancing bit diameter with screw depth and material type, you’ll prevent stripping, secure stability, and sustain strong support.
Whether working with wood, drywall, or brick, selecting sharp, suitable bits safeguards your setup. Stay sharp, stay steady, and save yourself from sloppy screw slips.
Smart sizing simplifies successful, sturdy installations every time. When determining what size drill bit for Ring Doorbell installation, always consider the manufacturer’s recommendations to ensure optimal fit and durability.