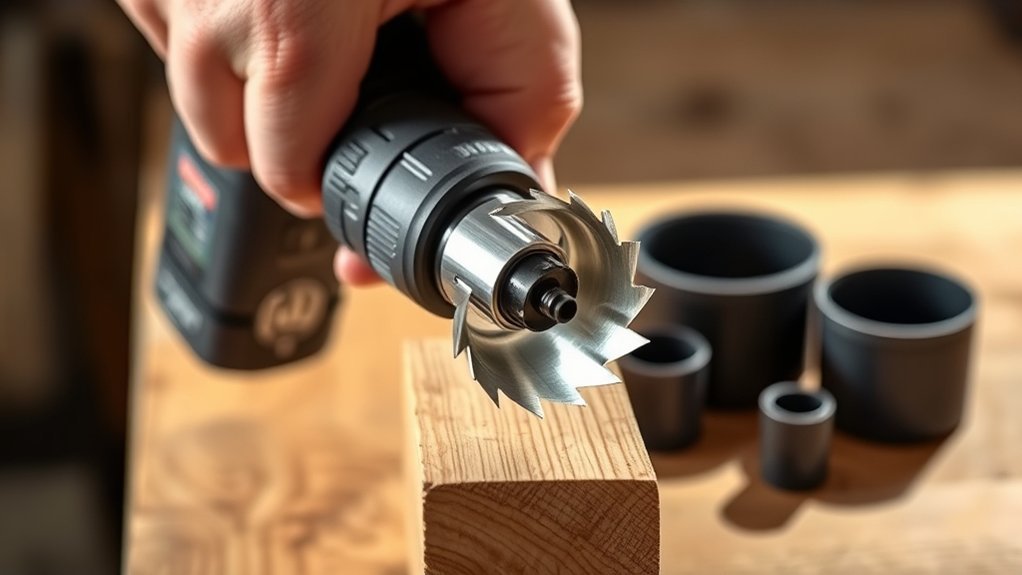
When you need to create a large, clean hole in wood, metal, or drywall, using a hole saw drill bit is your best bet. This specialized bit makes the job easier and delivers professional results.
But getting the cut right requires more than just attaching the bit to your drill. You’ll want to pick the right size, position it carefully, and drill with control to avoid damage or uneven edges.
Let’s walk through the key steps to guarantee your hole looks professional and fits perfectly.
What Is a Hole Saw Drill Bit and When to Use It

A hole saw drill bit is a specialized tool designed to cut large, clean holes in various materials like wood, metal, and plastic. You’ll find different hole saw types, including bi-metal, carbide-tipped, and diamond-coated, each suited for specific materials and cutting needs.
When choosing a hole saw, consider the material, hole size, and your drill’s power. Proper drilling techniques are essential: use a pilot bit to guide the hole saw, apply steady pressure, and maintain a slow to moderate speed to avoid overheating. Keep the drill perpendicular to the surface for a clean, accurate hole.
Get Your Drill and Workspace Ready Safely
Before you start, put on safety glasses and gloves to protect yourself from debris.
Clear your workspace of any clutter to guarantee you have enough room to maneuver your drill. Make sure your drill is fully charged or plugged in and ready for use.
Select Proper Safety Gear
Safety gear protects you from potential hazards when using a hole saw drill bit, so you’ll want to equip yourself properly before you begin. Start by putting on safety goggles to shield your eyes from flying debris and dust.
Next, wear ear protection to guard against the loud noise generated by the drill. Depending on your work environment, consider gloves to protect your hands and a dust mask if you’re cutting materials that create fine particles.
Make certain your clothing fits snugly to avoid getting caught in the drill. By selecting and wearing the right safety gear, you reduce the risk of injury and guarantee a smoother, safer drilling experience.
Never skip this step; it’s essential for your protection every time you use the hole saw drill bit.
Prepare Clean Work Area
Once you’ve put on your protective gear, clear your workspace to prevent accidents and improve efficiency. Start by removing any clutter, tools, or debris that might get in your way.
Use simple cleaning techniques like sweeping dust and wiping surfaces with a damp cloth to guarantee a clean, safe area. Organize your drill, hole saw bits, and accessories within easy reach to maintain smooth workflow and reduce distractions.
Check that your work surface is stable and well-lit. Proper workspace organization helps you focus on the task, minimizing mistakes. Finally, secure your material firmly to avoid movement during drilling.
Pick the Right Hole Saw Drill Bit for Your Project
Choose a hole saw that matches the material you’re cutting to guarantee clean, efficient holes. Measure carefully to pick the right size for your project, and consider the tooth configuration for smoother cuts or faster drilling.
Getting these choices right will save you time and prevent damage to your workpiece.
Material Compatibility
Different hole saw drill bits work best with specific materials, so matching the bit to your project is essential. For wood compatibility, choose bi-metal or carbon steel hole saws; they cut cleanly through soft and hardwoods without dulling quickly.
If you’re working with metal, opt for bi-metal or carbide-tipped hole saws designed to handle tougher surfaces like steel or aluminum. Avoid using wood-compatible bits on metal, as they’ll wear out fast and could damage your drill.
Also, make sure your drill speed suits the material to prevent overheating. By selecting a hole saw with the right material compatibility, you’ll get cleaner cuts, extend the bit’s life, and work more efficiently.
Always check the manufacturer’s recommendations to match your bit with your project’s material.
Size Selection Tips
Selecting the right hole saw size is essential for achieving a clean, precise cut and ensuring your project fits together properly. Start by reviewing your project requirements to determine the exact hole sizes needed.
Measure carefully or refer to design plans to avoid guesswork. Choose a hole saw that matches these dimensions closely; too large or small can compromise the fit or stability of the components. Remember, hole saw sizes are usually marked on the side. Double-check before drilling.
If you need multiple hole sizes, consider a hole saw set to cover all your needs efficiently. Proper size selection not only saves time but also prevents material waste and rework, making your project smoother from start to finish.
Tooth Configuration Choices
The teeth on a hole saw drill bit determine how cleanly and efficiently it cuts through various materials. When choosing tooth types, consider the material you’re working with.
Bi-metal teeth offer durability and cutting efficiency for wood, plastic, and metal. Carbide-tipped teeth excel on harder surfaces like tile and masonry, giving you cleaner cuts and longer bit life.
For softer materials, fine-toothed hole saws reduce splintering and produce smoother edges. Coarse-toothed bits remove material faster but may sacrifice precision.
Match the tooth configuration to your project’s demands to optimize cutting efficiency and prevent bit damage. Using the right tooth types not only improves your cut quality but also extends the lifespan of your hole saw drill bit, saving you time and money in the long run.
Mark and Position Your Hole Saw Drill Bit Spot
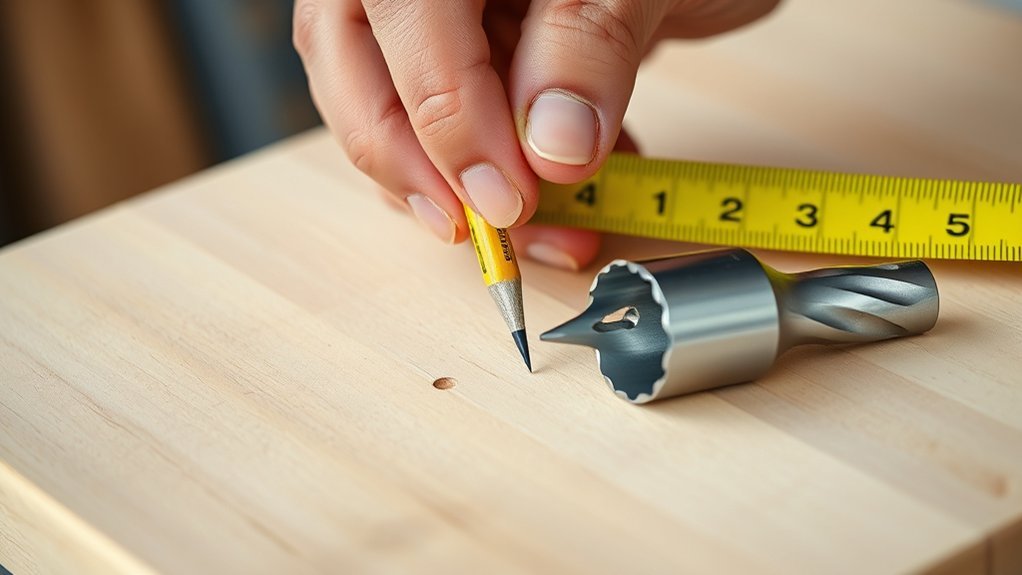
Before drilling, you’ll want to accurately mark the spot where you intend to cut. Use precise marking techniques like a pencil dot, center punch, or masking tape to prevent the bit from slipping.
If your surface is reflective or uneven, apply masking tape first for better visibility and grip. Next, employ effective positioning methods by aligning the pilot bit of the hole saw exactly over your mark.
Double-check the alignment from multiple angles to avoid off-center holes. Secure your workpiece firmly to maintain this positioning throughout drilling. Proper marking and positioning guarantee clean, accurate holes and reduce the risk of damaging your material or the bit.
Check alignment carefully and secure your workpiece to ensure precise, clean holes and protect your tools.
Taking these preparatory steps saves time and frustration when you start drilling with your hole saw bit.
Step-By-Step Guide to Drilling With a Hole Saw Bit
Once you’ve marked and secured your drilling spot, it’s time to start cutting. Attach the hole saw bit firmly to your drill, guaranteeing the pilot bit is centered. Begin drilling at a slow speed to let the pilot bit guide the hole saw accurately.
Apply steady, even pressure without forcing the bit, allowing it to cut through the material. For thicker surfaces or tougher hole saw applications, pause occasionally to clear debris and prevent overheating.
Maintain control by keeping the drill perpendicular to the surface, which guarantees a clean, precise hole. Once the hole saw bit has cut through, slowly retract the drill while it’s still spinning to avoid jagged edges.
These drilling techniques will help you create perfect holes efficiently and safely.
Avoid Common Mistakes and Finish Your Hole Like a Pro
How can you avoid common pitfalls that ruin your hole saw project? First, make certain your drill’s speed matches the material; too fast causes overheating and dulls the bit. Secure your workpiece firmly to prevent movement.
Avoid applying excessive pressure. Let the saw do the cutting to maintain control and prevent damage. Use professional techniques like backing your material with scrap wood to reduce splintering.
After drilling, clean the edges with a file or sandpaper for a smooth finish. Finally, regularly clear debris from the hole saw to maintain cutting efficiency.
Conclusion
Using a hole saw drill bit is like planting a seed—you start with the right tools and careful preparation, then nurture the process patiently. By choosing the right bit, marking your spot, and drilling steadily, you create a clean, precise hole that opens new possibilities in your project.
Treat each cut as a step toward building something stronger and more complete. With practice, your skills will grow, turning simple holes into gateways for success. Mastering how to use a hole saw drill bit will enhance your ability to tackle a variety of tasks with confidence.