Removing a stuck drill bit from a keyless chuck might seem as simple as twisting the chuck by hand, but often debris or rust causes it to bind tightly.
Before applying force, it’s important to evaluate the best method to avoid damaging the chuck or the drill bit itself.
Understanding the correct sequence—from hand loosening to applying lubricants and using tools carefully—can save you both frustration and potential damage to your equipment.
Let’s explore the precise steps to get that drill bit moving again without causing harm.
How to Loosen a Stuck Drill Bit by Hand
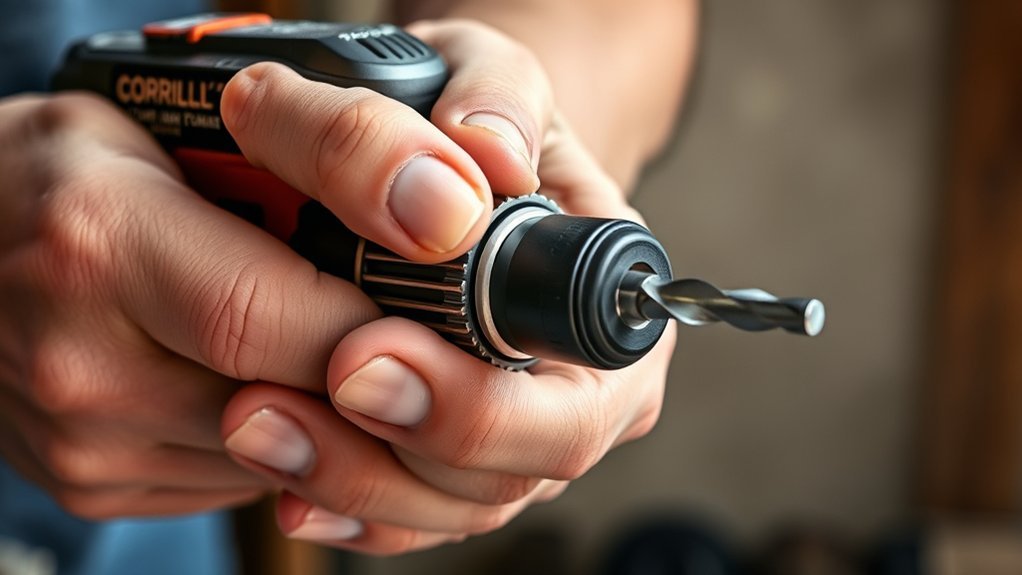
Although stuck drill bits can be frustrating, you can often loosen them by hand with the right technique. First, confirm the drill is powered off and unplugged for safety.
Firmly grasp the drill’s chuck with your hand grip, positioning your palm for maximum leverage. Use manual twisting to rotate the chuck counterclockwise, applying steady, controlled force. Avoid sudden jerks to prevent damage.
Grasp the drill chuck firmly and twist counterclockwise with steady, controlled force to safely loosen stuck bits.
If the bit resists, try wiggling it gently while maintaining the twist to break any debris or rust binding it. Maintain consistent pressure during manual twisting to gradually free the bit.
Once loosened, carefully remove the drill bit by pulling it straight out. This method relies on precise hand grip and controlled rotation, making it effective for most minor jams without additional tools.
Safely Using Tools to Free a Jammed Drill Bit
When hand loosening fails to free a jammed drill bit, you’ll need to use tools carefully to avoid damaging the drill or bit. Follow safety precautions strictly and make sure you have a firm grip during tool handling. Use adjustable wrenches or pliers with padded jaws to prevent marring the chuck. Apply steady, controlled force rather than sudden jerks.
| Tool | Usage Tip |
|---|---|
| Adjustable Wrench | Grip chuck firmly, turn slowly |
| Pliers | Use padded jaws to avoid damage |
| Hammer | Tap gently if needed |
| Cloth/Rag | Protect chuck surface |
Always wear safety goggles and gloves. Avoid excessive force to prevent tool or equipment damage.
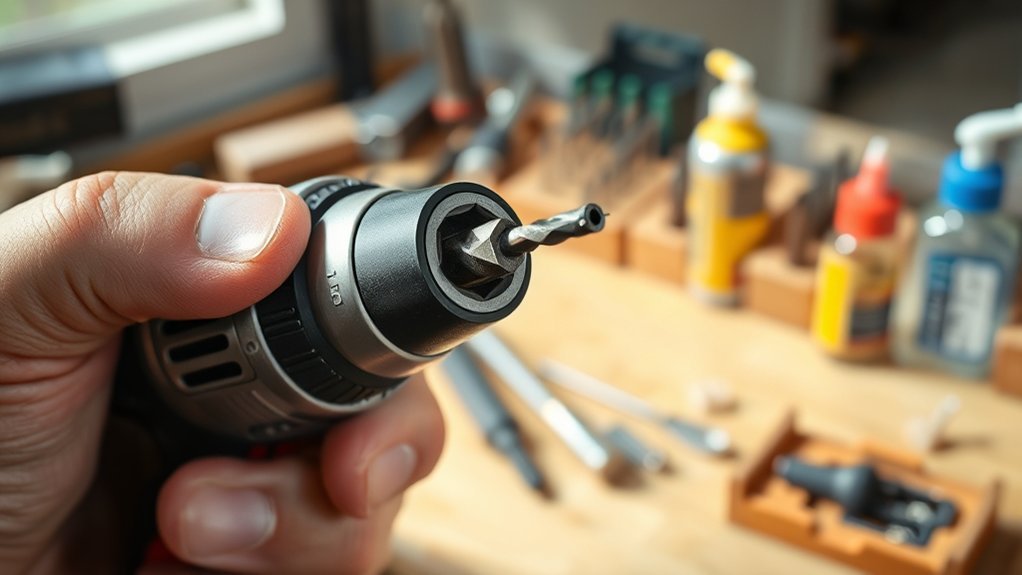
How to Use Heat or Lubricants to Loosen a Stuck Bit

If manual tool use doesn’t free the stuck drill bit, applying heat or lubricants can help expand or loosen the materials causing the jam. Start with controlled heat application using a heat gun or hairdryer directed at the chuck area for 2-3 minutes. This expands metal components, reducing tightness. Avoid open flames that risk damage.
After heating, try loosening the bit with pliers. If heat alone doesn’t work, apply lubricant types such as penetrating oil or WD-40 directly into the chuck mechanism. Allow 10-15 minutes for the lubricant to penetrate and reduce friction between the bit and chuck.
Then, attempt to twist the bit free. Repeat heat application and lubrication if necessary, but avoid excessive force to prevent damaging the keyless chuck.
Additional Tips for Removing Stubborn Drill Bits
Sometimes, even heat and lubricants won’t free a stubborn drill bit. In such cases, apply controlled tapping around the chuck with a rubber mallet to break internal corrosion. Avoid excessive force that may damage the chuck.
Next, try gently twisting the chuck collar back and forth while pulling the bit out; this leverages slight movement to ease drill bit removal. If accessible, clean the chuck’s internal jaws using a small brush or compressed air to remove debris affecting grip.
Regular chuck maintenance, including lubrication of moving parts, prevents future sticking issues. When these methods fail, consider using specialized chuck wrenches designed for keyless chucks to apply additional torque safely.
Always wear protective gloves to guarantee safety during the process.
How to Prevent Drill Bits From Getting Stuck Again
To prevent drill bits from getting stuck again, you should routinely clean and lubricate the chuck to minimize corrosion and debris buildup. Incorporate preventative maintenance by inspecting the chuck and bits before each use, removing dust, metal shavings, and applying a light machine oil.
Proper drill bit selection also plays a critical role; always use bits designed for your material and guarantee they fit snugly but not excessively tight in the chuck. Avoid forcing bits into the chuck, as this can cause binding.
Additionally, periodically check for wear or damage on both the bit shank and chuck jaws, replacing components as needed. By combining careful bit selection with regular maintenance, you’ll reduce the likelihood of bits seizing, guaranteeing smoother operation and extending the lifespan of your drill and accessories.
Maintaining Your Keyless Chuck to Avoid Stuck Bits
To keep your keyless chuck working smoothly, clean it regularly to remove debris and dust. Apply proper lubrication to prevent corrosion and guarantee easy tightening and loosening.
Always install bits correctly, making sure they’re seated firmly to avoid slipping or sticking during use.
Regular Cleaning Practices
Although a keyless chuck is designed for convenience, it demands regular cleaning to prevent drill bits from getting stuck. Establish a cleaning frequency based on your usage, typically after every 10 hours of operation or monthly if used less frequently.
Begin by removing the drill bit and inspecting the chuck for debris, dust, and metal shavings. Use a small brush or compressed air to clear out particles lodged between the jaws and the sleeve. Avoid using water or solvents that can cause corrosion.
Chuck maintenance also involves checking for signs of wear or damage during cleaning. Keeping the chuck free of contaminants guarantees smooth operation and prevents the jaws from seizing. Adhering to these regular cleaning practices extends the chuck’s lifespan and reduces the risk of stuck drill bits.
Proper Lubrication Techniques
Since friction and grime can cause your keyless chuck to bind, proper lubrication is crucial for smooth operation and preventing stuck drill bits. Choose lubrication types suited for metal components, such as light machine oil or silicone-based lubricants. Avoid heavy greases that can attract dust and debris.
When applying lubricant, clean the chuck thoroughly first to remove old residues. Use application techniques like applying a few drops directly into the chuck’s jaws and rotating the chuck to distribute the lubricant evenly. Wipe off excess to prevent buildup.
Regularly lubricate after cleaning or heavy use to maintain ideal performance. Proper lubrication reduces wear, prevents corrosion, and guarantees the chuck’s moving parts operate without seizing, helping you avoid the hassle of stuck drill bits.
Correct Bit Installation
Three key steps guarantee you install drill bits correctly and prevent them from getting stuck in your keyless chuck. First, verify correct bit alignment by inserting the drill bit straight into the chuck jaws. Misalignment can cause uneven gripping and increase the risk of the bit seizing.
Second, engage the chuck by hand, rotating it until the jaws grip the bit securely but not fully tightened. Third, apply proper tightening by firmly twisting the chuck sleeve until the bit is held firmly in place without excessive force. Over-tightening can damage the chuck or bit, while under-tightening allows slipping.
Following these steps maintains chuck integrity and verifies smooth bit changes, reducing stuck bit incidents and prolonging tool lifespan.
When to Seek Professional Help for Stuck Bits?
If your efforts to remove a stuck drill bit have failed despite using standard methods, it’s time to contemplate professional help. Persistent jamming may indicate internal damage or corrosion beyond basic drill bit maintenance.
Professionals have specialized tools and expertise to disassemble keyless chucks without causing further harm. Attempting excessive force risks damaging the chuck or drill motor, escalating repair costs.
Experts use specialized tools to safely remove stuck bits, preventing damage and costly repairs.
Seek professional services when the bit resists removal after applying penetrating oil, heat, or manual extraction techniques. Additionally, if you notice unusual wear or mechanical issues during maintenance, consult experts to prevent tool failure.
Timely intervention by professionals guarantees safe removal, preserves drill integrity, and extends equipment lifespan, saving you time and money in the long run. Don’t hesitate to reach out when standard solutions fall short.
Conclusion
By firmly gripping the chuck and twisting with steady, deliberate force, you can often free a stuck drill bit as if loosening a rusted bolt on an old machine.
If resistance remains, carefully apply penetrating oil or gentle heat, letting the metal soften and release its grip.
Always prioritize safety—wear gloves and goggles—and don’t hesitate to seek expert help if the bit won’t budge.
With patience and precision, you’ll restore your drill to smooth operation and successfully remove the stuck drill bit from the keyless chuck.