Jewelry pliers are essential tools in any jewelry-making toolkit, and how you use them can greatly impact your results. You might not realize that the way you hold your jewelry pliers affects both precision and control more than the type of pliers you use.
Gripping them too tightly or too far from the hinge can strain your hands and lead to uneven bends or damaged pieces.
Mastering a proper grip and understanding the subtle differences between plier types is essential if you want professional-looking results.
Before you start shaping wire loops or closing jump rings, there’s a key technique to learn that makes all the difference.
What Jewelry Pliers Are and How They Work
Although jewelry pliers might seem like simple tools, they play an essential role in shaping, bending, and securing delicate metal components with precision; their jewelry pliers functionality is indispensable. When you grasp these essential tools, you engage with specialized tips, flat, round, or chain-nose, that allow you to manipulate tiny links, wires, and clasps without marring the metal.
Their ergonomic design guarantees controlled pressure, enabling you to twist or close jump rings seamlessly. The pivot joint amplifies your hand’s force, so even the most intricate bends become effortless.
How to Hold Jewelry Pliers So You Have Better Control
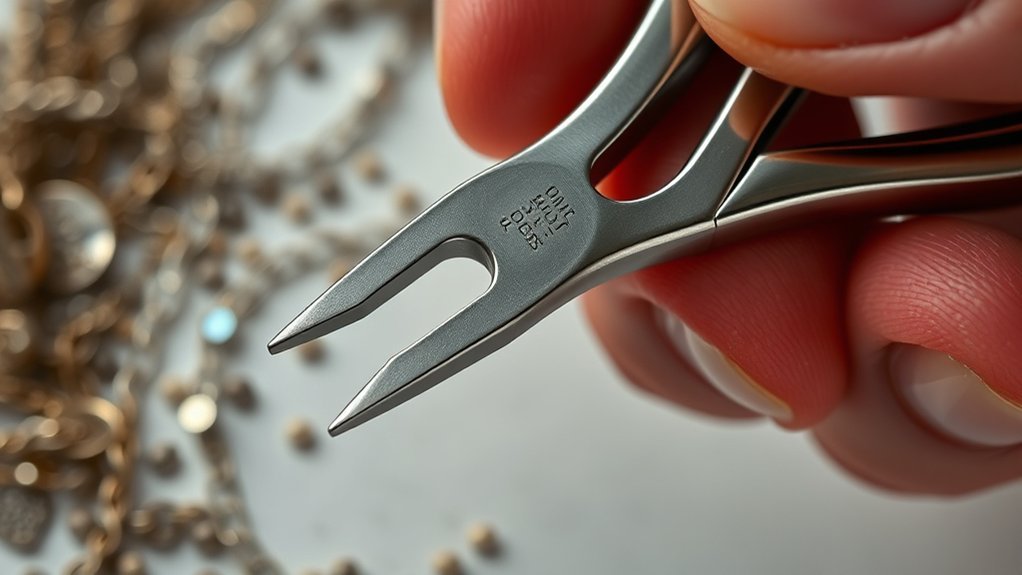
To master jewelry pliers, you need to adopt a precise grip that balances firm control with flexibility. Position your thumb and index finger near the hinge to maximize leverage, while your middle finger supports the handle for stability.
This hand placement reduces fatigue and increases accuracy when shaping delicate pieces.
Proper Grip Techniques
When you grasp jewelry pliers correctly, you gain the precision needed to shape delicate metals and secure tiny components without slipping or exerting excess force. Focus on maintaining consistent grip strength, firm enough to control the tool, yet gentle to avoid damaging your workpiece.
Position your thumb and index finger near the pivot joint; this maximizes leverage and responsiveness. Your middle finger should support the lower handle for added stability, while your ring and pinky fingers wrap naturally, preventing hand fatigue.
Avoid gripping too tightly, which reduces finesse and causes strain. By mastering this balance of grip strength and hand positioning, you’ll wield your pliers with enhanced control, enabling delicate bends and secure closures that elevate your jewelry craftsmanship to a professional level.
Hand Positioning Tips
Three key points define ideal hand positioning for jewelry pliers: finger placement, wrist alignment, and grip adaptability. Start by positioning your thumb and index finger near the pliers’ jaws to maximize hand stability, while your middle finger supports the handle’s underside. This finger placement guarantees precise control over delicate movements.
Align your wrist so it remains straight, avoiding awkward angles that cause fatigue and reduce accuracy. Your grip should be firm yet flexible, allowing subtle adjustments without straining muscles.
As you work, adapt your hand’s tension to the task: tighter for firm bends, lighter for gentle tweaks. By mastering these nuanced hand positioning tips, you’ll wield your jewelry pliers with enhanced precision and comfort, transforming your craftsmanship and reducing the risk of slipping or errors.
Types of Jewelry Pliers and Their Uses
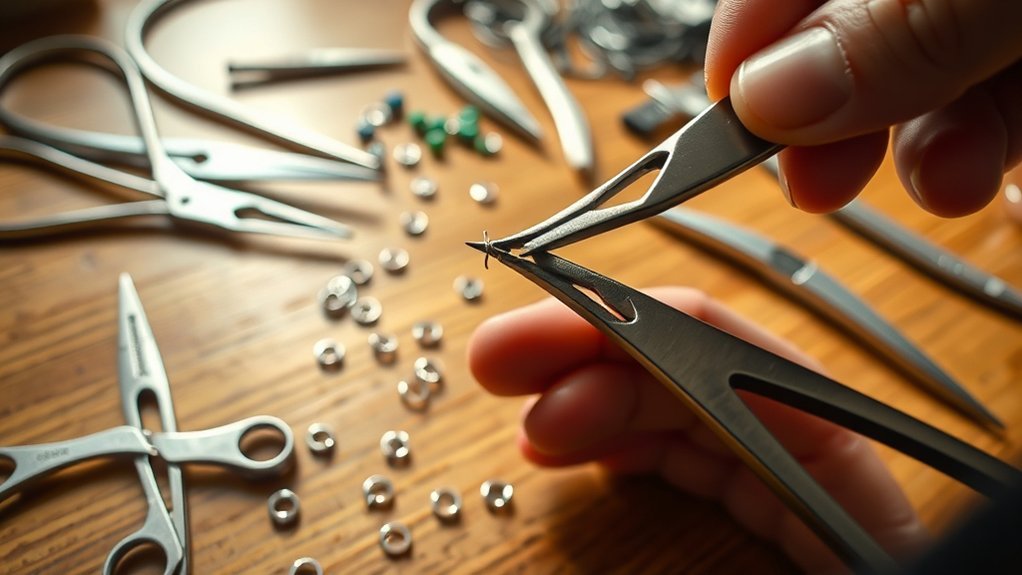
Jewelry pliers come in various shapes and sizes, each designed to perform specific tasks with precision and control. Needle-nose pliers excel at bending wire in tight spaces, while round-nose pliers form smooth loops essential for jump rings and clasps. Flat-nose pliers grip without marring surfaces, perfect for holding components steady. Chain-nose pliers combine flat and tapered jaws, offering versatility for both gripping and bending.
Understanding pliers material differences is vital; steel jaws with nickel plating resist corrosion, ensuring longevity with proper jewelry pliers maintenance. Handles often feature cushioned grips for comfort and reduced hand fatigue. By selecting and caring for the right type, you’ll enhance your craftsmanship, making intricate adjustments and secure connections effortlessly.
How to Choose Jewelry Pliers Based on Your Project Type
When selecting jewelry pliers, consider the material you’ll work with. Softer metals need smooth, rounded tips to avoid marring, while harder materials demand sturdy, pointed jaws.
Pay attention to the tip type, whether chain-nose, round-nose, or flat-nose, as each shapes and manipulates components differently.
Finally, make certain the handles fit comfortably in your hand and provide a secure grip to maintain control during intricate tasks.
Project Material Compatibility
Although selecting the right pliers might seem straightforward, understanding how different materials respond to various tools is essential for achieving clean, precise results. When working with metals, consider metal compatibility.
Softer metals like copper or silver require pliers with smooth, non-marring jaws to prevent scratches, while harder metals demand sturdier, well-aligned tools for firm bends. For delicate bead types such as glass or gemstone beads, choose pliers that offer gentle grip and control to avoid chipping or cracking.
Additionally, if your project involves intricate wirework or mixed materials, you’ll want pliers that balance strength with finesse. Always match your pliers’ material and jaw finish to the specific demands of your project’s components for peak performance and professional-quality craftsmanship.
Pliers Tip Types
Selecting the right pliers goes beyond just matching them to your material; the shape and design of the pliers’ tips directly influence how you manipulate your components. For intricate wirework, round-nose pliers with smooth, tapered tips offer precision bending without marring surfaces.
Flat-nose pliers deliver firm, wide grips, perfect for holding or straightening metal. Chain-nose pliers, with their pointed, slightly curved tips, excel at reaching tight spaces and opening jump rings.
When choosing, consider pliers tip materials: hardened steel resists deformation, while nickel or chrome plating prevents corrosion. Proper pliers tip maintenance is crucial: avoid dropping or excessive force to preserve tip alignment and gripping surfaces.
Tailoring your pliers tip type to your project guarantees clean, controlled manipulations and extends your tool’s longevity.
Handle Comfort And Grip
Comfort and control go hand in hand when working with jewelry pliers, especially during extended sessions or delicate tasks. You’ll want pliers featuring ergonomic designs that fit naturally in your hand, reducing strain and enhancing precision.
Look for handles shaped to support your fingers’ natural curve, preventing fatigue as you manipulate tiny components. Grip materials also play an essential role; soft rubber or silicone coatings provide slip-resistant surfaces, allowing you to maintain steady control even if your hands get sweaty.
For intricate projects, a firm yet cushioned grip lets you apply just the right amount of pressure without sacrificing finesse. By prioritizing handle comfort and grip materials tailored to your project type, you’ll work more efficiently and protect your hands from unnecessary stress or injury.
How to Use Jewelry Round-Nose Pliers to Shape Wire Loops
When you grasp wire with round-nose pliers, you can create precise loops essential for many jewelry designs. These pliers excel at loop creation by allowing you to shape wire with smooth, uniform curves. Position the wire near the pliers’ tapered jaws, then rotate your wrist to wrap the wire around the round tips, controlling loop size and symmetry.
Grasp wire with round-nose pliers to craft smooth, precise loops perfect for jewelry designs.
For consistent results, keep these tips in mind:
- Use the jaw’s narrowest part for small loops and move towards the thicker end for larger loops.
- Maintain steady pressure to avoid kinks during wire shaping.
- Adjust your grip to create different loop orientations, such as perpendicular or angled.
Mastering these techniques enhances your wire shaping skills, enabling elegant, durable loops in your jewelry projects.
How to Open and Close Jump Rings With Chain-Nose Pliers
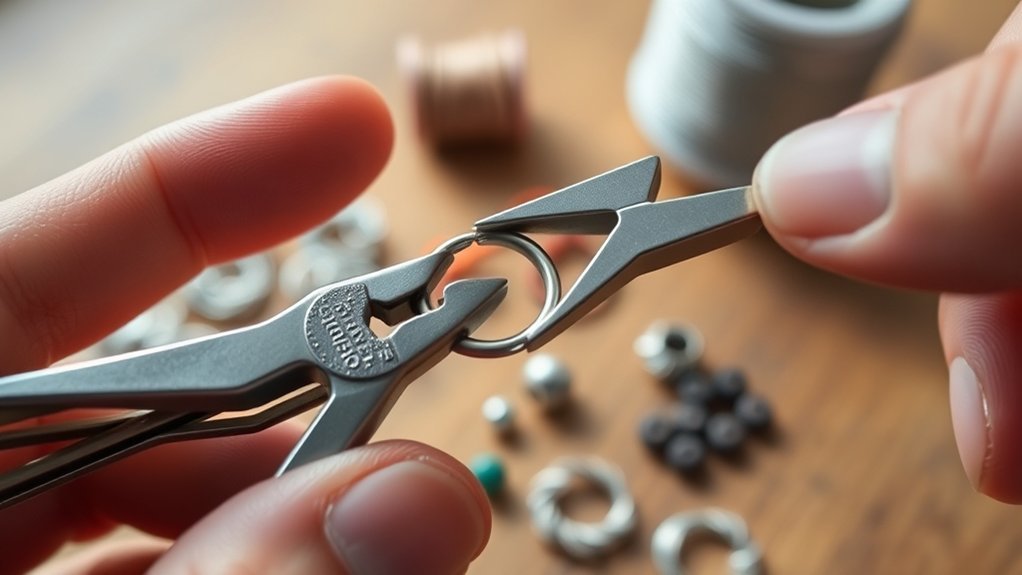
Grasp the jump ring firmly with your chain-nose pliers, positioning the jaws on either side of the split to maintain control without distortion. Use a gentle twisting motion, moving one hand forward and the other backward, to open the ring cleanly along its natural seam.
When closing, align the ends precisely and apply steady pressure to secure the ring without gaps, ensuring a seamless connection.
Proper Grip Technique
A steady hand and precise positioning are essential to master the proper grip technique for opening and closing jump rings with chain-nose pliers. You need to balance grip strength without squeezing too hard, which could deform the ring. Finger placement plays a significant role in maintaining control and preventing slippage.
To achieve ideal grip technique:
Position your thumb and index finger near the plier’s hinge for maximum leverage and control. Use your middle finger to stabilize the handle, ensuring steady pressure without fatigue. Apply just enough grip strength to hold the jump ring firmly while keeping the plier tips aligned with the ring’s opening.
This precise finger placement and measured grip strength let you manipulate jump rings cleanly and efficiently.
Twist Motion Guidance
Mastering the proper grip sets the stage for executing the precise twist motion needed to open and close jump rings without distortion. Hold the jump ring firmly with one chain-nose plier while the other plier grasps the opposite side.
Instead of pulling apart, apply a subtle twist technique by moving the pliers laterally. This prevents the wire from bending out of shape. The goal is controlled twisting wire motion, maintaining the ring’s circular integrity.
| Action | Result |
|---|---|
| Lateral Twist | Keeps ring shape intact |
| Pulling Apart | Distorts and weakens the wire |
| Gentle Pressure | Guarantees smooth opening/closing |
Use this method consistently to preserve your jump rings’ strength and aesthetic appeal.
Securing Closed Rings
Begin by aligning your chain-nose pliers carefully on either side of the jump ring’s opening, ensuring a firm but gentle grip. Avoid pulling the ring apart; instead, twist it sideways to open or close, preserving its circular shape.
Mastering ring securing techniques is essential for durable jewelry.
To close the ring securely using effective ring closing methods:
Twist the ends toward each other without overlapping to maintain a flush seam.
Use a second plier in your other hand for better control and alignment.
Gently press the seam with pliers to eliminate any visible gaps and reinforce the closure.
These precise steps guarantee a professional finish while preventing the ring from snagging or loosening during wear.
How to Use Flat-Nose Pliers for Bending and Flattening
Although flat-nose pliers may look simple, they provide precise control when bending and flattening metal components in jewelry making. Grip the metal firmly between the wide, flat jaws to execute clean bending techniques without marring the surface.
Use slow, steady pressure to create sharp, accurate angles essential for forming loops or shaping wire frames. For flattening methods, position the metal between both jaws, then gently squeeze and adjust the grip to smooth out kinks or irregularities.
Apply slow, steady pressure with flat-nose pliers to form precise angles and smooth out metal imperfections.
The flat, smooth surfaces guarantee even pressure distribution, preventing scratches. Mastering these pliers means you can manipulate delicate metals with confidence, achieving crisp bends and polished flat areas that enhance your piece’s structural integrity and aesthetic.
Experiment with varying pressure to control the metal’s response precisely.
How to Crimp Beads and Clasps With Jewelry Pliers
Secure your jewelry components by learning to crimp beads and clasps using specialized pliers designed for the task. Mastering crimp bead techniques guarantees your pieces stay durable and professional-looking.
Start by threading your wire through the crimp bead, loop it through the clasp, then back through the bead. Position the crimp bead in the plier’s crimping notch and squeeze firmly to flatten and fasten it. Use the rounded side of the pliers to smooth out any sharp edges.
Effective clasp attachment methods rely on precise crimping to prevent slippage and wear.
Key steps include:
- Positioning the crimp bead correctly for even pressure
- Applying consistent force to avoid damaging delicate wire
- Finishing with a gentle squeeze to round off edges and enhance strength
Using Different Pliers Together for Tricky Jewelry Jobs
When you tackle intricate jewelry designs, combining different types of pliers enhances your control and precision, allowing you to manipulate small components without damaging them. Employing combination techniques like pairing round-nose pliers with chain-nose pliers lets you shape loops while simultaneously gripping the wire securely.
For advanced applications, use bent-nose pliers alongside flat-nose pliers to access tight angles and hold findings firmly. This synergy prevents slippage and guarantees clean bends. By switching between tools strategically, you can efficiently open jump rings, close crimps, or adjust delicate links.
Mastering these combination techniques not only streamlines your workflow but also elevates the quality of your finished pieces, giving you the versatility needed for complex assemblies and fine detailing in your jewelry projects.
Tips to Avoid Marks and Damage When Using Pliers
Combining different pliers effectively can boost your craftsmanship, but it also increases the risk of leaving unwanted marks or damaging delicate components if you’re not careful. To master mark prevention techniques and damage reduction strategies, you need to treat each piece with precision and protect the metal’s surface during every grip.
Master precise grips and protect metal surfaces to prevent marks and damage when using multiple pliers.
Here are key tips to avoid damage when using pliers:
Use protective coverings: Wrap jaws with tape or rubber tubing to cushion contact points and prevent scratches.
Apply consistent, gentle pressure: Avoid squeezing too hard; gradual force controls bending without deforming the metal.
Select the right plier type and size: Matching tool to task minimizes slippage and reduces the chance of marring or breaking fragile links.
Implementing these approaches guarantees your jewelry stays pristine while you work with confidence.
Conclusion
Now that you’ve navigated the nuances of jewelry pliers, you’re primed to perfect precise, polished pieces. By blending balanced grips with the best tool for the task, you’ll bend, twist, and tame tough metals with total technique.
Remember, steady strength and smart selection safeguard your sparkle from scratches and snafus. So grab your gear, get going, and craft enchanting creations confidently—
Your careful control will make every masterpiece magically meticulous when you master how to use jewelry pliers.