Attaching metal snaps with pliers might seem straightforward, but achieving a clean, secure fit requires attention to detail and proper technique.
If you’re aiming for snaps that hold firmly without damaging your fabric, you’ll need to understand the right placement, alignment, and pressure to apply.
Mastering these steps guarantees your snaps perform reliably and look professional.
Let’s explore how to get it right every time.
Tools and Materials Needed for Metal Snaps
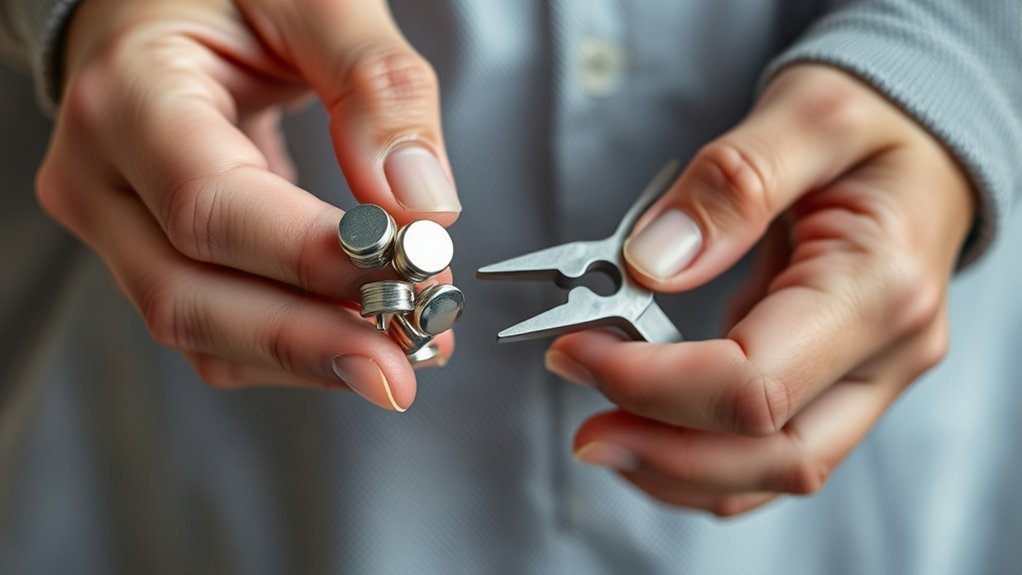
To attach metal snaps effectively, you’ll need a few essential tools and materials. First, select the appropriate snap types, commonly cap and socket or stud and post, that suit your project.
Consider fabric compatibility carefully. Heavier fabrics like denim require sturdier snaps, while lightweight fabrics need smaller, less invasive options to prevent damage.
You’ll need a snap setter or anvil designed for the chosen snap type, a hammer or specialized tool, and a fabric marker to position accurately. Verify the snaps are made from corrosion-resistant metal for durability.
Also, gather scissors or a hole punch if your fabric requires preparation. Having these materials ready guarantees a precise, secure attachment, improving the functionality and longevity of your project.
Why Attach Metal Snaps With Pliers?
Although you can use various tools to attach metal snaps, pliers provide the control and pressure needed for a secure fit without damaging the fabric or snap components. By applying even, targeted pressure, pliers guarantee the snap parts interlock firmly, maximizing durability benefits and preventing premature failure.
This precision reduces the risk of misalignment, which can compromise both function and aesthetic appeal. Unlike hammers or presses, pliers offer tactile feedback, enabling you to adjust force in real time for ideal results. Using pliers also minimizes fabric distortion around the snap area, preserving your project’s clean look.
Consequently, for professional-quality attachments that combine strength and visual neatness, pliers are the preferred tool to achieve consistent, reliable outcomes.
Prepare Your Fabric for Metal Snaps
Mastering the use of pliers sets the stage for properly preparing your fabric to receive metal snaps. Start by selecting a fabric suitable for snaps. Medium-weight woven fabrics like denim or canvas provide enough strength and stability.
Avoid lightweight or loosely woven materials that may tear under stress. Next, mark the snap placement precisely on your fabric using tailor’s chalk or a washable pen. Verify the snap locations align perfectly on both fabric layers to guarantee a secure closure.
Use a ruler or measuring tape to maintain consistent spacing and alignment. Before installing, reinforce the snap areas with interfacing or an extra fabric patch to prevent distortion and prolong durability. Proper fabric selection and accurate snap placement are critical for a professional, long-lasting finish.
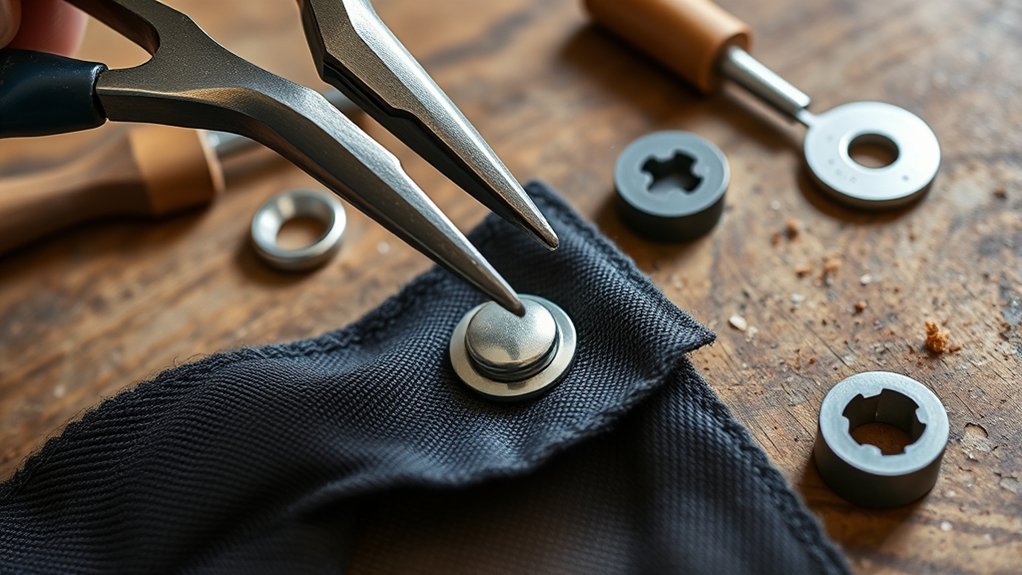
How to Attach Metal Snaps With Pliers
Grab your pliers and metal snaps to begin the attachment process. First, identify the snap types you’re working with, typically cap, socket, stud, and post. Position the fabric between the snap components.
Use the pliers to align and press the snap parts firmly, ensuring a secure fit. Different installation techniques may require varying pressure or angles, so adjust accordingly.
| Snap Type | Function | Installation Technique |
|---|---|---|
| Cap | Visible front piece | Place on fabric, press with pliers |
| Socket | Female part | Align under cap, secure tightly |
| Stud | Male part | Position opposite socket, clamp |
Work methodically to avoid misalignment and damage.
Tips for Secure, Even Metal Snap Attachment
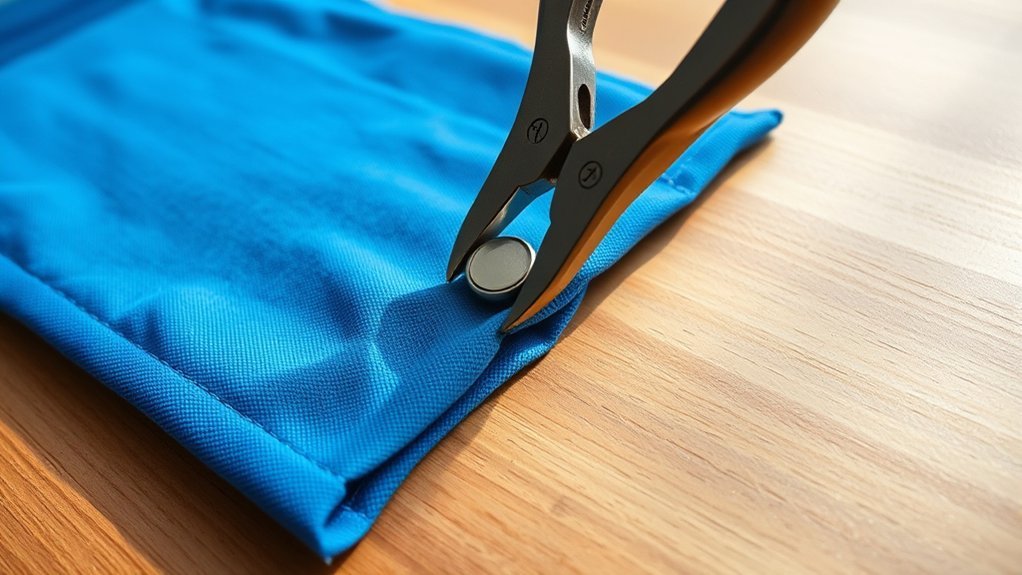
When attaching metal snaps, guaranteeing even pressure and secure placement is essential to prevent misalignment and weak fastening. Begin by positioning the snap components precisely, focusing on snap placement to align both parts correctly.
Use a flat, stable surface to avoid uneven pressure during attachment. Hold the pliers firmly, applying gradual, consistent force to secure the snap without distorting the fabric or metal.
Apply steady, even pressure on a flat surface to attach snaps without damaging fabric or metal.
Double-check snap alignment before squeezing the pliers to maintain proper fit. Avoid over-tightening, which can damage the snap or material.
If necessary, mark snap placement lightly with a fabric pencil to guide accurate positioning. Following these steps guarantees your metal snaps attach securely and evenly, enhancing durability and function in your project.
Troubleshooting Common Snap Attachment Issues
Several common issues can arise during metal snap attachment, but you can troubleshoot them effectively with the right approach. If snaps don’t align properly, first check your positioning; use precise measurements and mark placement points clearly.
Adjust your technique with snap misalignment solutions such as repositioning the snap halves or using alignment tools to guarantee even pressure during attachment. Fabric thickness considerations are essential—too thick material can prevent snaps from closing properly, while too thin fabric may distort under pressure.
Use appropriate snaps and pliers designed for your fabric’s thickness. If the snap sets unevenly or loosens, reassess your tool’s calibration and apply consistent force. By addressing these factors methodically, you’ll guarantee durable, correctly aligned metal snap attachments every time.
Caring for Your Metal Snaps to Keep Them Working
Although metal snaps are durable, proper care guarantees they maintain functionality and appearance over time. Start by regularly inspecting snaps for dirt or debris, which can impede operation.
Use a soft brush or cloth to clean them gently. Apply snap maintenance tips like lubricating moving parts with a small amount of light machine oil to guarantee smooth action.
To prevent rust, keep snaps dry and store items in low-humidity environments. Employ rust prevention techniques such as wiping snaps with a cloth lightly soaked in a corrosion inhibitor.
Avoid exposing snaps to harsh chemicals or prolonged moisture. Following these steps helps preserve the snaps’ mechanical integrity and aesthetic, guaranteeing they work reliably and last longer.
Regular maintenance reduces the need for replacements and supports consistent snap performance.
Conclusion
Attaching metal snaps with pliers is like fitting puzzle pieces perfectly together—precision and steady hands create a seamless bond.
By carefully marking, aligning, and applying just the right pressure, you’ll guarantee your snaps hold firm without damaging fabric. With practice, your technique will become as sharp as the tools you use.
This attention to detail gives your projects a professional finish that snaps into place every time. Keep these steps close, and your snaps will last through countless wears.
Mastering how to attach metal snaps with pliers ensures your work is durable and looks polished every time.