When you pick up split ring pliers, your goal is to open those tight coils smoothly without damaging the ring or your fingers.
Using split ring pliers correctly means gripping the handles just right and positioning the tips precisely between the ring’s loops.
Applying steady pressure is key to avoid bending or warping the ring.
But the real challenge lies in sliding attachments on or off without frustration—getting this part right will save you time and hassle.
What Are Split Ring Pliers and Why Use Them?
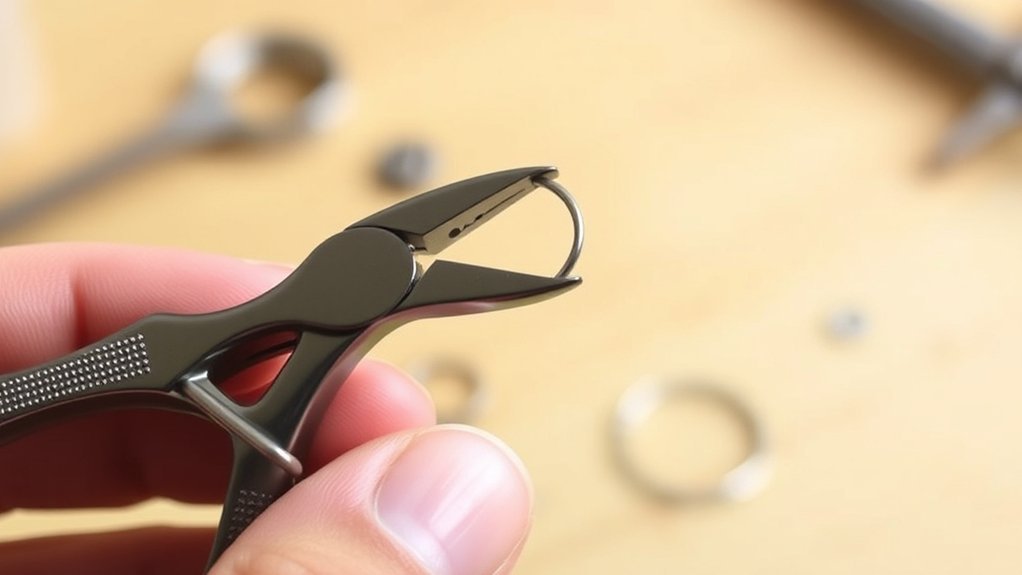
Split ring pliers are specialized tools designed to open the tightly wound coils of split rings, making it easier for you to attach or remove items like keys, fishing lures, or jewelry components. These pliers are essential for various split ring applications because they prevent damage to the rings and your fingers.
When using them, you’ll notice the fine tips that fit precisely between the coils, allowing controlled prying without bending or breaking the ring. Most split ring pliers are made from durable plier materials such as stainless steel or carbon steel, providing strength and corrosion resistance.
Some models also feature ergonomic grips for comfort during repetitive tasks. Using the right tool simplifies your work, saves time, and guarantees the longevity of your split rings in many practical projects.
Picking the Right Split Ring Pliers
Choosing the right pliers can make all the difference in handling split rings effectively. Start by identifying the different types available: standard split ring pliers, those with tapered tips, and heavy-duty models. Each suits specific split ring features like size and thickness.
For delicate jewelry rings, choose pliers with fine, narrow jaws to prevent damage. If you work with larger or tougher rings, opt for heavy-duty pliers that offer better grip and leverage.
Pay attention to the jaw shape, curved or straight, to match the ring’s coil design for easier opening. Also, consider comfort features like ergonomic handles, which reduce hand fatigue during extended use.
How to Hold Split Ring Pliers for Best Control
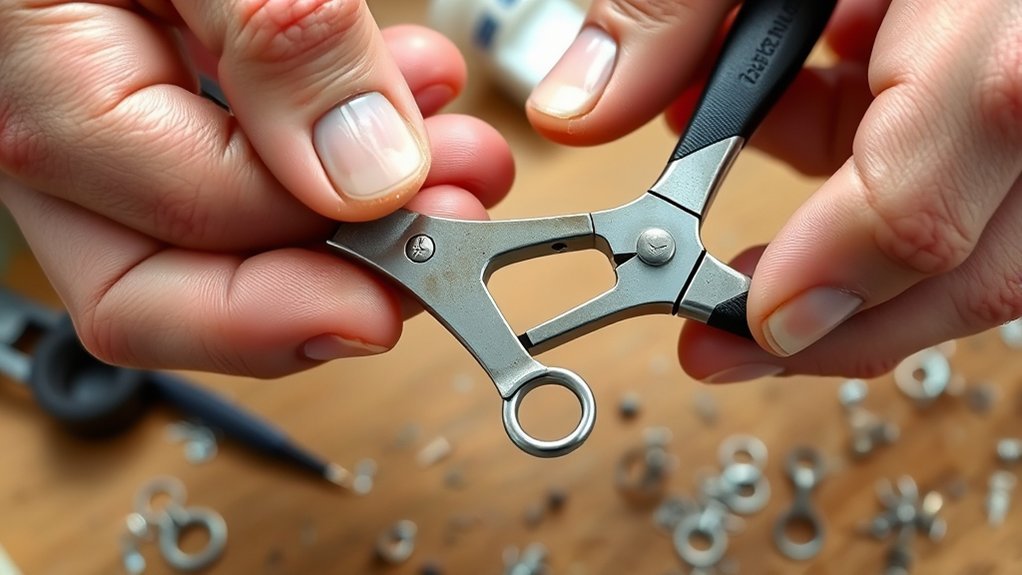
Once you’ve selected the right pliers, you’ll want to hold them correctly to maintain steady control and avoid slipping. Focus on hand positioning: place your thumb on one handle and your index and middle fingers on the other. This setup maximizes grip strength without causing fatigue. Keep your grip firm but relaxed to prevent shaking.
| Steady Grip | Precise Control | Comfortable Hold |
|---|---|---|
| Thumb placement | Finger alignment | Avoid over-tightening |
| Balanced pressure | Smooth movement | Reduce hand strain |
Proper hand positioning lets you open the split ring smoothly and safely. Adjust your grip if you feel tension, ensuring consistent control throughout your work. This technique enhances accuracy and prevents accidents.
How to Open a Split Ring Safely
To open a split ring safely, grip the pliers firmly near the tip to maintain control without slipping. Make sure your fingers stay clear of the ring’s edges to avoid pinching while you carefully twist the ring open.
Apply steady, even pressure to expand the ring just enough for attachment without overstretching or deforming it.
Proper Grip Technique
Mastering the proper grip technique is essential for opening a split ring safely and efficiently. First, position your dominant hand so your thumb rests on one handle and your middle finger supports the other. This setup maximizes your grip strength while maintaining control.
Place the split ring between the plier tips, adjusting your hand positioning to guarantee precision. Use steady pressure to pry the ring open without forcing it.
| Step | Hand Positioning | Grip Strength Focus |
|---|---|---|
| 1 | Thumb on top handle | Firm but controlled |
| 2 | Middle finger under handle | Balanced pressure |
| 3 | Adjust fingers for comfort | Maintain steady grip |
This technique reduces strain and improves safety during use.
Avoiding Finger Pinches
Although split ring pliers are designed for ease, you’ll need to stay mindful of finger placement to prevent pinches. Always position your fingers away from the jaws’ pivot point, where the split ring opens, to avoid sudden closures.
Use safety precautions like wearing finger protection gloves or finger cots to reduce injury risk. When gripping the pliers, keep your thumb and index finger steady on the handles, ensuring your other fingers support the grip without overlapping the moving parts.
Open the ring slowly and deliberately, allowing you to react if the ring snaps back. Never rush the process. Controlled, careful movements minimize pinching hazards.
Controlled Ring Expansion
When you open a split ring, controlling its expansion is crucial to prevent damage to the ring or injury to yourself. Start by positioning the split ring pliers so the tips align with the ring’s coils.
Apply controlled tension by squeezing the handles gently. Too much force can deform the ring or cause it to slip. Maintain ring stability by keeping the ring steady in your other hand or on a flat surface.
Slowly twist the pliers to open the ring just enough to insert your hook or attachment. Avoid overexpanding; this preserves the ring’s shape and strength. Practicing controlled ring expansion guarantees you work safely and efficiently while maintaining the integrity of both the ring and your fingers.
Adding and Removing Items With Split Ring Pliers
To add or remove items, start by carefully opening the split ring with your pliers to create a small gap. Slide the attachment onto the ring’s open end, then rotate the ring to thread it securely.
Make sure each item is firmly seated before closing the ring to prevent accidental loss.
Opening Split Rings
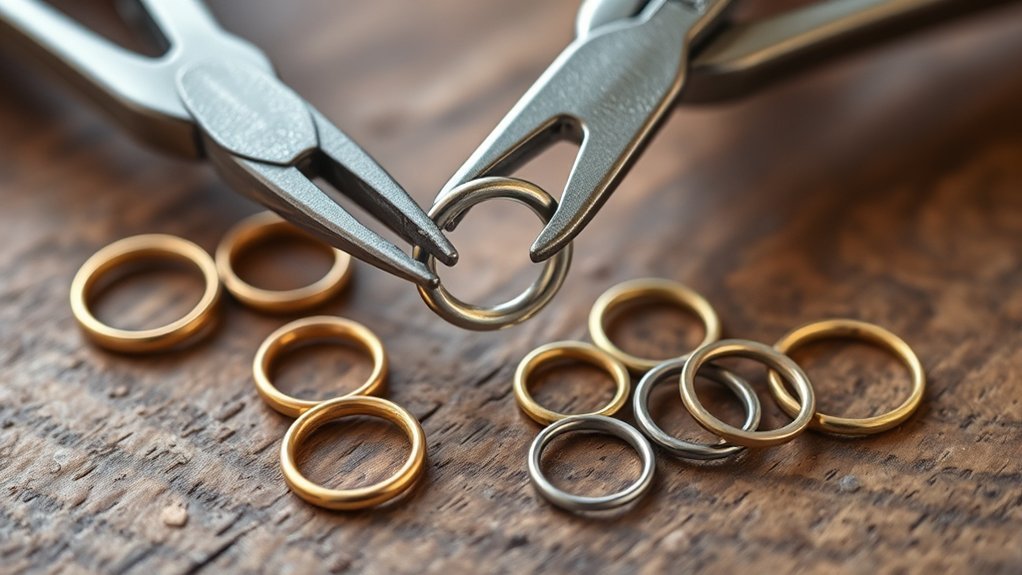
Using split ring pliers to open split rings makes adding or removing items much easier and more precise. To start, position the pliers’ tip into the split ring’s gap, then gently squeeze to pry the rings apart just enough to slide your attachment in or out.
This controlled opening prevents bending or damaging the ring during split ring installation or split ring removal. Avoid forcing the ring open wide; a small gap is enough to work efficiently. Keep your grip steady to maintain control and accuracy.
Once the ring is open, maneuver your item onto or off the ring smoothly. Practice this technique to speed up your work and guarantee your attachments stay secure without deforming the split ring.
Securing New Attachments
Although opening the split ring is a crucial first step, securing new attachments requires careful alignment and steady hands. To add or remove items with split ring pliers, position the attachment’s hole near the opened section of the ring.
Gently slide it along the coil, rotating the ring to move the attachment through the overlap. Avoid forcing it, as this can damage the ring or attachment. For beginners, use tips for beginners like working under good lighting and holding the ring steady with one hand while maneuvering the pliers with the other.
If you encounter resistance, pause and adjust the angle. These troubleshooting techniques prevent bending or breaking the ring. Practice patience and precision to guarantee attachments stay securely in place without compromising the ring’s integrity.
Using Split Ring Pliers With Different Ring Sizes and Materials
Handling various split ring sizes and materials requires a careful approach to guarantee a secure grip without damaging the ring. Start by identifying the ring size variations you’ll be working with; smaller rings need more precision, while larger ones demand stronger leverage.
Choose split ring pliers designed to accommodate these size differences, making sure the tips fit snugly into the ring’s gap for maximum control. Next, consider material compatibility. Softer metals like brass or aluminum require gentler pressure to avoid deformation, whereas stainless steel rings tolerate firmer handling.
Adjust your grip accordingly and apply steady pressure to open the ring just enough to slide on attachments. By matching plier size and technique to the specific ring size and material, you’ll guarantee efficient, damage-free handling every time.
How to Avoid Damage When Using Split Ring Pliers
To avoid damaging your split rings or pliers, always handle the tool with steady, controlled pressure. Make certain you select the right size of pliers designed for the specific ring material and thickness you’re working with.
Using the proper tool and technique guarantees clean openings without bending or scratching the rings.
Proper Tool Handling
Three key practices will help you avoid damage when using split ring pliers. First, always maintain a firm but controlled grip to prevent slipping and guarantee tool safety. Avoid applying excessive force, which can deform both the pliers and the split ring.
Second, utilize the ergonomic design by positioning your hand comfortably, reducing strain and increasing precision during use. Third, keep the pliers clean and lubricated to guarantee smooth operation and prevent wear.
When handling the tool, align the jaws precisely with the split ring’s opening to minimize stress on the metal. By following these steps, you’ll extend the lifespan of your pliers and protect your workpieces from damage, making your task safer and more efficient every time you use them.
Choosing Correct Pliers
Although selecting the right split ring pliers might seem straightforward, choosing incorrectly can easily damage both your tool and the rings you’re working with. Start by understanding the different types of pliers available: needle-nose, bent-nose, and flat-nose.
Needle-nose pliers are ideal for small, tight rings, while bent-nose offers better angles for leverage. Always check the materials used. Steel pliers with a corrosion-resistant coating provide durability and prevent rust, while softer metal tips help avoid scratching delicate rings.
Avoid pliers with rough or worn jaws, as these can deform the rings. Selecting pliers with cushioned grips also improves control. By carefully matching plier type and material to your specific task, you’ll protect your rings and extend your tool’s lifespan.
How to Maintain and Clean Your Split Ring Pliers
Regular maintenance and cleaning keep your split ring pliers in ideal condition and extend their lifespan. Start by wiping the pliers after each use with a clean, dry cloth to remove dirt and debris.
For deeper cleaning, use a small brush to get into the grooves and pivot area, guaranteeing no particles hinder movement. Apply a few drops of light machine oil to the pivot joint and work the pliers open and closed to distribute lubrication evenly.
When storing, keep them in a dry place to prevent rust. Avoid harsh chemicals that could damage the metal.
These maintenance tips and cleaning techniques prevent corrosion and guarantee smooth operation, helping your split ring pliers stay reliable for every task.
What to Do When Split Rings Get Stuck
If your split ring gets stuck, don’t force it, as that can damage both the ring and your pliers. Instead, pause and assess the situation. First, check if debris or rust is causing the stuck rings; cleaning the ring and pliers with a small brush and lubricant can help.
Next, try gently twisting the ring with slight pressure using your pliers, applying steady, controlled movements rather than brute force. If the ring still won’t budge, consider using a thinner, pointed tool to carefully separate the ring’s coils, but be cautious not to deform the ring.
These troubleshooting techniques prevent damage and guarantee smooth operation. Taking these steps will help you resolve stuck rings effectively and keep your tools in good shape.
Common Mistakes to Avoid When Using Split Ring Pliers
Knowing how to handle stuck split rings without damaging them is important, but equally important is recognizing common mistakes that can cause issues in the first place. Avoid these common blunders to prevent plier mishaps:
- Forcing the pliers open too wide, which can deform or break the ring.
- Using the wrong type or size of pliers, reducing control and increasing damage risk.
- Neglecting to position the pliers’ tips correctly on the ring’s gap, leading to slippage.
- Applying excessive pressure instead of gentle, steady force, causing the ring to warp.
Conclusion
Now that you’ve got the knack for using split ring pliers, think of them as your trusty key to accessing tiny metal puzzles. Keep your grip steady and your movements smooth, like a dancer gliding across the floor, and you’ll slide attachments on and off with ease.
Remember, patience and control are your best friends—force only tightens the ring’s grip. With practice, you’ll handle every split ring like a pro, turning tricky tasks into second nature.
Mastering these tools will make your work seamless. In the end, your confidence and skill with split ring pliers will open up a world of crafting possibilities.