Imagine the satisfying snap as your eyelet pliers secure a perfect metal ring through fabric or leather, adding both function and style.
Using eyelet pliers might seem tricky at first, but with a few simple steps, you’ll quickly master the technique.
Getting the right grip and alignment is key. Once you do, your projects will take on a polished, professional look.
Let’s explore how to make eyelet pliers work for you.
What Are Eyelet Pliers and Why You’ll Love Using Them
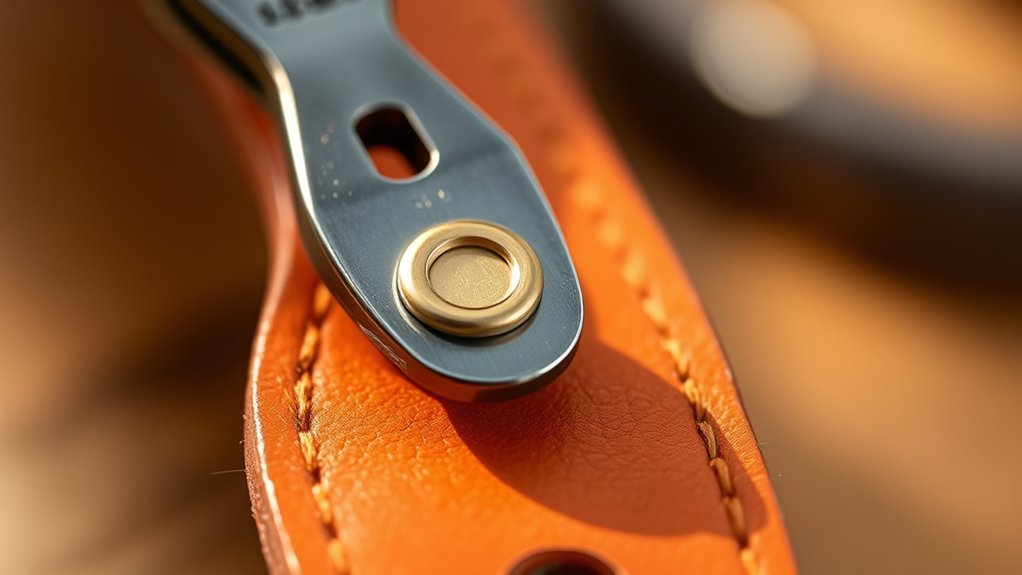
Eyelet pliers are simple yet powerful tools that make adding eyelets to your projects quick and easy. When you use them, you’ll instantly see how they save time and effort compared to manual methods.
These pliers work by punching a hole and setting the eyelet in one smooth motion, ensuring a secure, professional finish. You can experiment with different eyelet types, such as metal, plastic, or colored, to match your style and boost your project’s appeal.
Whether you’re working on scrapbooking, clothing, or home décor, eyelet pliers open up endless project inspiration. Once you start using them, you’ll appreciate how they enhance your creativity and provide durable, neat results every time.
Give them a try, and your crafting will reach a whole new level.
How to Pick the Perfect Eyelets for Your Project
Choosing the right eyelets can make a big difference in both the look and function of your project. When picking eyelets, start by considering eyelet sizes to guarantee they fit your material without causing damage or slipping.
Selecting eyelets that fit perfectly ensures both style and secure function in your project.
Next, focus on choosing colors that complement or contrast your design for added visual appeal. Keep in mind the material type and thickness, as this affects which eyelets will hold best. Also, think about the purpose, decorative or functional, to select the correct style. Finally, consider durability if your project will face wear and tear.
Here’s what to focus on:
- Match eyelet sizes to material thickness
- Choose colors that enhance your design
- Select eyelets suited for your project’s purpose
- Consider material compatibility
- Prioritize durability for long-lasting results
Preparing Your Materials Before Setting Eyelets
Before you set any eyelets, make certain your materials are clean, dry, and free of wrinkles or folds. Proper surface preparation guarantees the eyelets will fit securely and look professional.
Start with careful material selection. Choose fabrics or papers sturdy enough to hold the eyelets without tearing. Lay your material flat on a hard surface to avoid shifting during installation.
Smooth out any creases and remove dust or debris that might interfere with adhesion or cause uneven punching. If you’re working with fabric, consider stabilizing it with interfacing for extra strength.
Taking these preparation steps will make setting eyelets easier and enhance the durability of your project. Remember, good surface preparation sets the foundation for flawless results with your eyelet pliers.
How to Set Eyelets With Eyelet Pliers
Once you’ve prepared your materials, you’re ready to start setting the eyelets with your pliers. Begin by selecting eyelets that match your material to guarantee proper eyelet material compatibility.
Follow these eyelet installation techniques for a secure fit:
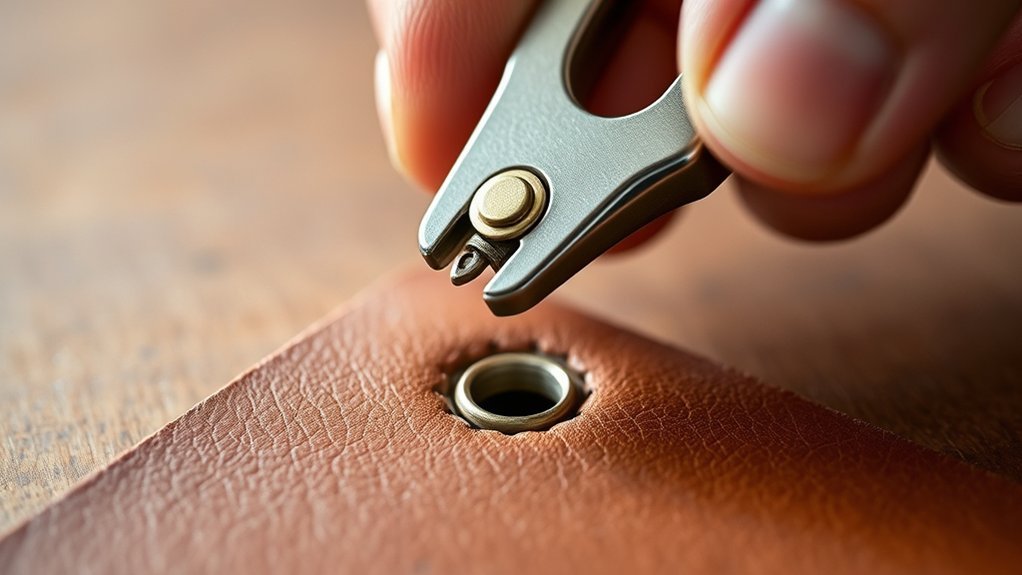
Insert the eyelet through the pre-punched hole in your material. Position the eyelet head in the pliers’ designated slot.
Align the anvil on the opposite side to support the eyelet. Squeeze the pliers firmly to crimp the eyelet securely.
Inspect the eyelet to confirm it’s tightly set without damaging the material.
Positioning Eyelets Correctly Using Eyelet Pliers
Before you set the eyelets, make certain to align them precisely to avoid uneven placement. Keep your fabric secure and flat so it doesn’t shift during the process.
Finally, check the eyelet orientation to guarantee it’s facing the right direction for a clean finish.
Aligning Eyelets Precisely
To align eyelets precisely, start by positioning the fabric and eyelet so they sit flush and centered. Using effective eyelet alignment techniques guarantees your project looks professional and functions well. Focus on precise placement strategies to avoid misalignment or uneven spacing.
Here’s how to get it right:
Lay your fabric flat on a firm surface to prevent shifting. Hold the eyelet firmly with the pliers, aligning the shaft perpendicular to the fabric. Check that the eyelet’s hole is centered over your pre-punched fabric hole.
Use gentle, steady pressure on the pliers to keep everything in place. Double-check alignment before setting the eyelet permanently.
Following these steps builds confidence and accuracy with every eyelet you set.
Securing Fabric Placement
Although aligning eyelets precisely is essential, securing your fabric firmly guarantees they stay perfectly positioned during setting. Start by using fabric alignment techniques like pinning or using fabric clips to hold your securing patterns tightly in place. Make certain the fabric lies flat without wrinkles to avoid shifting.
When you position the eyelet, hold the fabric steady with one hand while you operate the pliers with the other. This control prevents movement and guarantees the eyelet punches through exactly where you want it. Taking a moment to double-check your fabric placement before squeezing the pliers will save you from misaligned eyelets and wasted materials.
With these steps, you’ll confidently secure your fabric and set eyelets accurately every time.
Checking Eyelet Orientation
Since eyelets come with a front and back side, you’ll want to double-check their orientation before setting them with your pliers. Proper positioning guarantees a secure hold and a professional finish.
Different eyelet types may have distinct front designs or flange shapes, so recognizing these is key. Here are some orientation tips to keep in mind:
- Identify the decorative or smooth side; this usually faces outward.
- Align the flange (the wider side) on the fabric’s front.
- Insert the eyelet post through the fabric hole from front to back.
- Use your eyelet pliers to press the back side, guaranteeing a tight fit.
- Test with scrap fabric first to confirm correct orientation.
Following these steps helps you set eyelets confidently and correctly every time.
Tips for Using Eyelet Pliers on Fabric, Leather, and Paper
When working with fabric, leather, or paper, picking the right eyelets for your material is key to a strong hold. Make sure you prepare your surfaces by cutting clean holes and smoothing edges before you start.
Apply steady, even pressure with your pliers to secure the eyelets without damaging the material.
Choosing Appropriate Eyelets
Before you start using eyelet pliers, picking the right eyelets for your material is essential to guarantee a secure and neat finish. Eyelet materials and eyelet colors should match your project’s needs and aesthetic. For example, metal eyelets offer durability for leather, while plastic ones suit paper crafts.
Choosing the proper size guarantees a snug fit, preventing damage or loosening.
Keep these tips in mind when selecting eyelets:
- Match eyelet materials to your project (metal, plastic, brass).
- Choose eyelet colors that complement or contrast your material.
- Confirm eyelet size fits the hole and material thickness.
- Consider eyelets with washers for extra strength.
- Select corrosion-resistant eyelets for outdoor or wearable items.
This careful selection helps your project look polished and last longer.
Preparing Material Surfaces
Although eyelet pliers are straightforward tools, preparing your material surface correctly guarantees a clean, secure installation every time. Start with proper material preparation by choosing a flat, stable workspace.
For fabric and leather, gently clean the surface to remove dust, oils, or debris that could interfere with adhesion or damage the material. Use a soft cloth or brush for surface cleaning to avoid leaving residue.
When working with paper, make sure it’s dry and free from wrinkles to prevent tearing. Mark the exact spot for your eyelet placement to maintain precision.
Taking these steps helps your eyelets sit flush and hold firmly, whether you’re working with fabric, leather, or paper. Proper preparation sets you up for smooth, successful results every time you use your eyelet pliers.
Applying Consistent Pressure
Apply steady, even pressure when using eyelet pliers to confirm your eyelets secure properly without damaging the material. Mastering pressure techniques confirms a neat, durable finish, whether you’re working with fabric, leather, or paper.
Consistent application is key to avoid uneven crimps or material tears.
Keep these tips in mind for applying consistent pressure:
Position the pliers squarely over the eyelet to distribute pressure evenly.
Squeeze the handles slowly and steadily; avoid sudden force.
Use your dominant hand to control pressure while your other hand stabilizes the material.
Practice on scrap material to get a feel for ideal pressure techniques.
Adjust your grip strength depending on the thickness and type of material.
Troubleshooting Eyelet Placement and Fit
When you notice that your eyelets aren’t sitting properly or the fit feels off, it’s important to carefully assess both the placement and the size of the holes you’ve made. First, check for eyelet alignment issues; misaligned holes can cause uneven setting and a loose fit. Use a ruler or template to guarantee holes are accurately spaced.
Next, consider eyelet material compatibility. Some materials, like thick leather or heavy fabrics, may require specific eyelet types or slightly larger holes for a secure fit. If the hole is too small, the eyelet won’t insert properly; if too large, it won’t hold firmly. Adjust your hole size carefully with a punch or scissors before setting the eyelet.
Taking these steps guarantees your eyelets look professional and stay secure.
How to Care for Your Eyelet Pliers
Proper care for your eyelet pliers guarantees they stay reliable and effective for every project. To keep your tools in top shape, follow these maintenance tips and storage solutions that prevent wear and extend their lifespan.
- Clean your pliers after each use to remove debris and residue.
- Apply a light oil to the pivot joint regularly to maintain smooth movement.
- Inspect for damage or rust and address issues immediately.
- Store your pliers in a dry, secure place away from moisture to prevent corrosion.
- Use a protective case or pouch to avoid accidental damage when not in use.
Creative Projects Using Eyelets and Eyelet Pliers
You can easily add eyelets to your scrapbooking projects to create unique textures and secure embellishments. Try using eyelet pliers to craft custom jewelry pieces that stand out with a personal touch.
Plus, eyelets work great for fabric crafts, adding both decoration and functionality to your creations.
Scrapbooking Enhancements
Although scrapbooking already offers endless creative possibilities, adding eyelets with eyelet pliers can elevate your projects to a whole new level. You can instantly enhance your pages by choosing from various eyelet styles that match your project themes. Eyelets not only secure layers but also add a polished, professional touch.
Try these ideas to boost your scrapbooking:
- Frame photos with colorful eyelets for a vibrant border
- Create interactive tags or pull-outs using reinforced eyelets
- Use metallic eyelets to complement vintage or steampunk themes
- Attach charms or ribbons through eyelets for added texture
- Design custom borders by spacing eyelets evenly around page edges
With eyelet pliers, your scrapbook transforms into a tactile, eye-catching masterpiece.
Custom Jewelry Making
When crafting custom jewelry, eyelet pliers become an essential tool that lets you add durable, decorative elements quickly and neatly. You can create unique eyelet designs by attaching metal eyelets to leather, fabric, or thin metal sheets, giving your pieces a professional finish.
Start by choosing eyelets that complement your custom jewelry style, whether vintage, minimalist, or bold. Use the pliers to punch holes and secure eyelets firmly without damaging the material.
This technique not only enhances aesthetics but also strengthens connection points for chains or charms. Experiment with different sizes and colors of eyelets to elevate your designs.
With practice, you’ll confidently incorporate eyelet designs into your custom jewelry, making each piece both beautiful and long-lasting.
Fabric Craft Embellishments
Moving beyond jewelry, eyelet pliers open up exciting possibilities for fabric crafts by allowing you to add stylish and functional embellishments. Using eyelets, you can enhance your projects with durable holes and decorative accents, making your fabric stand out.
Try these creative techniques to elevate your fabric embellishments:
- Reinforce buttonholes or drawstring openings on bags and pouches
- Create laced corset-style details on clothing or cushions
- Add ventilation holes to fabric organizers or baskets
- Design custom tags or labels with eyelet reinforcements
- Attach charms or ribbons securely through fabric
With a little practice, you’ll find eyelet pliers indispensable for transforming simple fabric pieces into unique, professional-looking crafts. Give these ideas a try and watch your creative fabric embellishments come to life!
Avoiding Common Mistakes When Using Eyelet Pliers
One of the most important steps to master eyelet pliers is to avoid common mistakes that can damage your project or tools. One frequent error is applying too much pressure, which can crush the eyelet or tear your fabric. Always use steady, even pressure and verify the eyelet fits the hole properly.
Another common error is misaligning the pliers, leading to crooked or loose eyelets. To prevent this, hold the pliers firmly and double-check alignment before squeezing.
Follow best practices by practicing on scrap material first and cleaning your pliers regularly to maintain smooth operation. By avoiding these pitfalls and sticking to these best practices, you’ll achieve neat, durable eyelets that enhance your projects every time.
Conclusion
Now that you’ve got the hang of using eyelet pliers, you’re ready to tackle any project with confidence—no need to send a telegram about your success! Just remember to prep your materials well, align your eyelets carefully, and practice on scraps.
With a little patience, you’ll create clean, professional-looking finishes every time. Keep experimenting, and don’t be afraid to get creative.
Your eyelet skills will only get better from here! Mastering how to use eyelet pliers opens up so many crafting possibilities.