When you’re wiring a car battery, using crimping pliers correctly guarantees a safe, secure connection that won’t fail under stress.
Crimping pliers are essential tools in ensuring electrical connections are tight and reliable.
You’ll need to strip the wire precisely and choose the right die size for the connector before applying consistent pressure.
Mastering this process prevents loose crimps and electrical faults.
Understanding each step in detail will help you achieve professional-quality results every time.
This knowledge ensures your wiring is durable and safe for long-term use.
Choose the Right Crimping Pliers
Before you begin crimping, you need to choose the right crimping pliers for your specific task. Identify the crimping pliers types based on the connectors and wire gauge you’ll work with.
For insulated terminals, select pliers with a dedicated die set that matches the terminal size. Non-insulated connectors require different jaw configurations to guarantee proper compression without damaging the wire.
Consider ratcheting crimping pliers if you need consistent, repeatable crimps, as they release only after achieving the correct pressure. Understand the crimping techniques relevant to your application, such as indent or compression crimps, and choose pliers designed to execute them reliably.
Ratcheting crimpers ensure precise, repeatable crimps by releasing only at the correct pressure.
Selecting the appropriate tool guarantees secure electrical connections, minimizes signal loss, and prevents connector failure, enhancing overall system integrity.
Prepare Wires and Connectors for Crimping Pliers
Strip the wire insulation carefully to expose the correct length of conductor without nicking or damaging the strands. Use a quality wire stripping tool calibrated to the wire gauge to guarantee accuracy and prevent conductor damage. After wire stripping, inspect the exposed conductor for any frays or cuts.
Next, focus on connector selection; match connectors to the wire gauge and application to guarantee a reliable electrical connection. Choose insulated or non-insulated terminals based on environmental and safety requirements. Verify that the connector’s barrel size corresponds precisely to the stripped wire length for maximum crimping.
Proper preparation of wires and connectors guarantees secure mechanical and electrical integrity, reducing failure risks during use. Avoid attempting crimping before completing these preparation steps thoroughly.
How to Use Crimping Pliers Step-by-Step
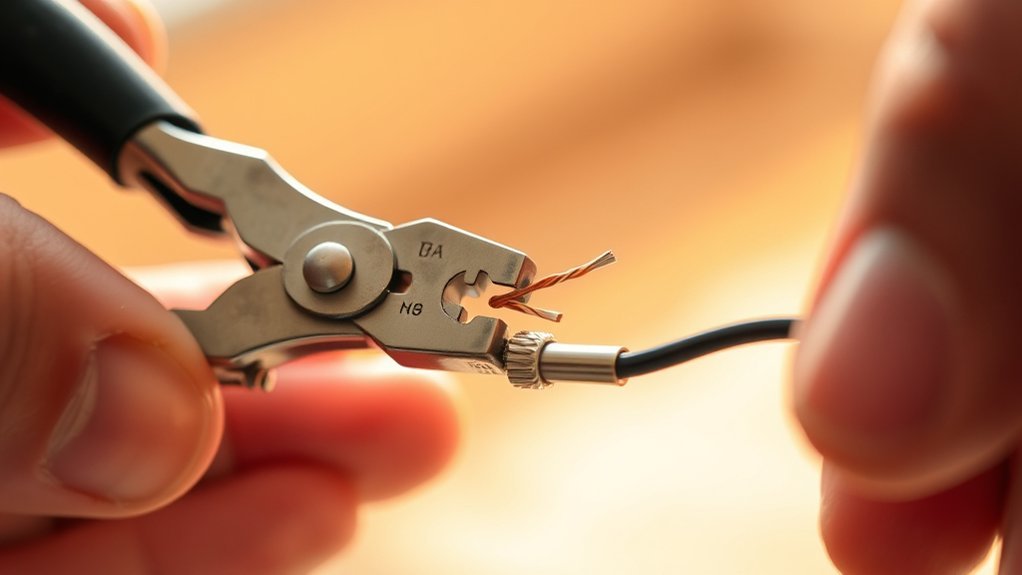
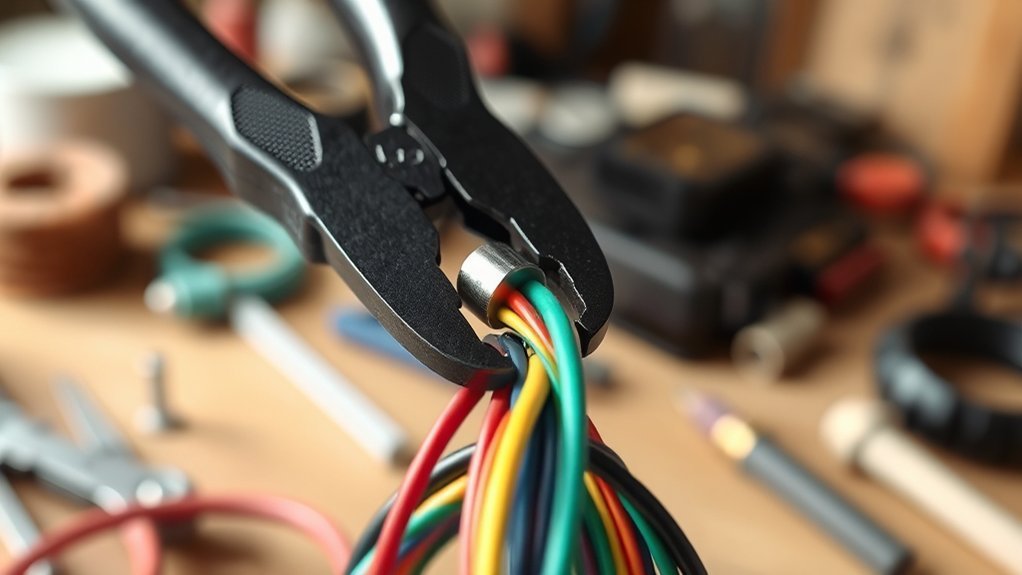
Once you’ve prepared the wires and connectors correctly, position the stripped wire into the connector’s barrel, guaranteeing full insertion without exposing conductor strands outside the barrel.
Select the appropriate crimping die on your pliers based on the wire types and connector size. Align the connector within the die, matching the crimping profile specified for that connector.
Apply steady pressure on the handles until the crimp clicks or locks, confirming a secure mechanical and electrical connection. Release the pliers and inspect the crimp for uniform compression and absence of damage.
Use consistent crimping techniques, avoiding partial crimps or over-compression, which compromise connection integrity. Repeat as needed for multiple wires, always matching wire types with compatible connectors and dies to guarantee reliable, durable crimps.
Test Your Crimped Connections
After completing the crimping process, you need to verify the integrity of each connection to assure reliable performance. Employing proper test methods guarantees that the crimped joints maintain electrical continuity and mechanical strength.
Begin by visually inspecting the crimps for uniform compression and absence of damage. Then, use a pull test to check mechanical stability. Apply a steady force to confirm the wire won’t slip.
Finally, measure electrical continuity with a multimeter to detect any resistance issues or breaks. These test methods help confirm connection integrity and prevent failures in your wiring system.
Troubleshooting Common Crimping Pliers Issues
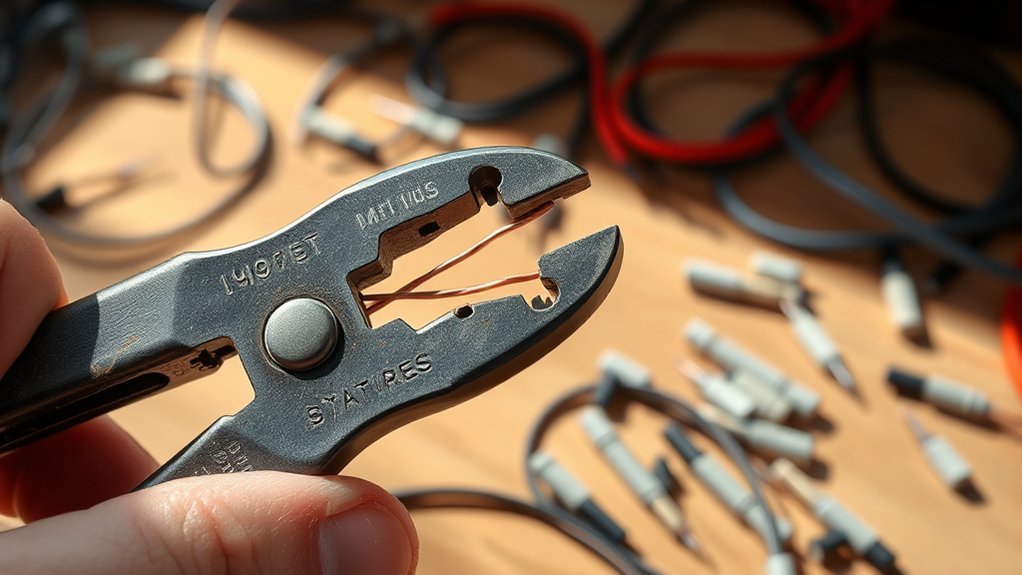
Several common issues can arise when using crimping pliers, and knowing how to identify and resolve them guarantees consistent, high-quality connections. If your crimps are loose or incomplete, check that the pliers’ die matches the terminal size and that you’re applying sufficient force.
Misaligned crimps often result from improper wire placement; confirm the wire is fully inserted and centered before crimping. Another frequent problem is uneven crimps, which usually indicates worn or damaged dies—inspect and replace them as needed.
If the pliers feel stiff or unresponsive, lubricate the pivot points and verify the mechanism moves smoothly. Mastering these troubleshooting steps will improve your crimping techniques and prevent electrical failures caused by poor connections.
Conclusion
Now that you’ve mastered stripping wires without nicking strands and aligning connectors just right, you might think crimping is a breeze. Yet, one wrong die or shaky pressure can turn your “secure” connection into a fragile failure.
So, don’t underestimate the click—it’s not just a sound; it’s your last line of defense. Follow the steps precisely, or you’ll spend more time troubleshooting than crimping.
Precision isn’t optional—it’s essential. To ensure every connection holds strong, mastering how to use crimping pliers correctly is key.