When your shower head won’t budge, using pliers might seem like the quickest fix to remove stuck shower head with pliers.
However, applying force without care can strip the threads or damage the fixture, making the problem worse.
Before you reach for the pliers, it’s important to know how to protect your shower arm and use the right technique.
This understanding can save you time and help avoid costly repairs.
Let’s explore how to approach the job safely and effectively to get your shower head off without causing damage.
Why Shower Heads Get Stuck
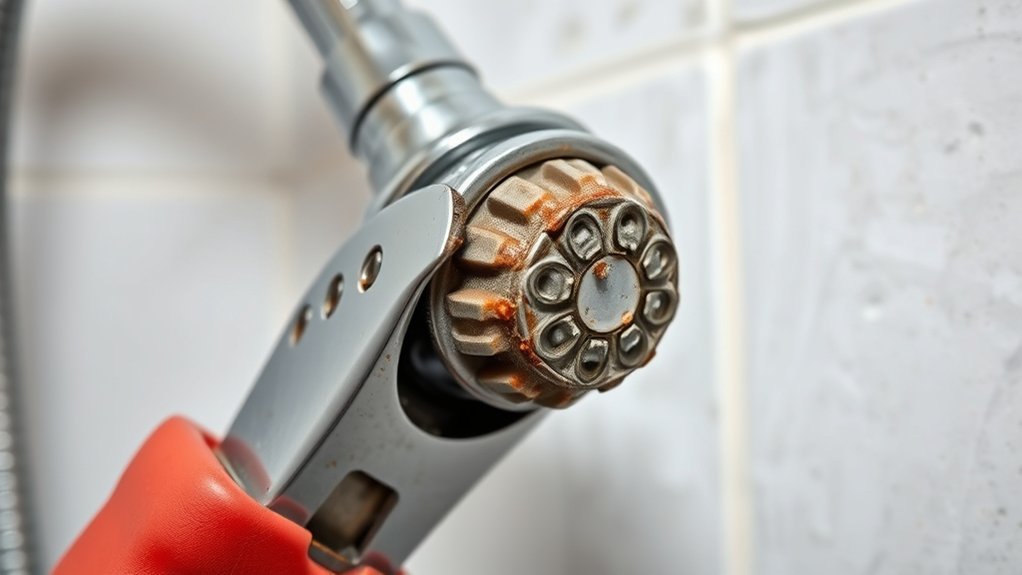
Although shower heads are designed for easy installation and removal, they often get stuck due to mineral buildup, corrosion, or worn-out threading. Hard water deposits accumulate inside the threads, creating a hardened layer that makes loosening difficult.
Corrosion, especially in metal fittings, further binds the connection, while worn threads reduce grip, complicating removal. To prevent these issues, regular shower head maintenance is essential.
Flush the shower head periodically and apply a mild descaling solution to dissolve mineral deposits. Use plumbing tips like wrapping threads with plumber’s tape during installation to reduce corrosion and ease future removal.
Addressing these factors proactively helps maintain smooth operation and simplifies any necessary replacements, saving you time and avoiding damage during removal.
When to Use Pliers for Removal
Mineral buildup and corrosion can make your shower head stubbornly difficult to remove by hand. You should use pliers only when manual effort fails, as applying excessive force prematurely risks damaging the fixture or plumbing.
The best practices involve protecting the shower head’s finish with a cloth before gripping with pliers to prevent scratches. Always turn the pliers slowly counterclockwise, maintaining steady pressure to avoid slipping.
Avoid common mistakes like using pliers without padding or applying jerky movements, which can strip threads or break components. If the shower head remains stuck after initial attempts, pliers provide the necessary leverage.
What Tools You Need to Remove a Stuck Shower Head
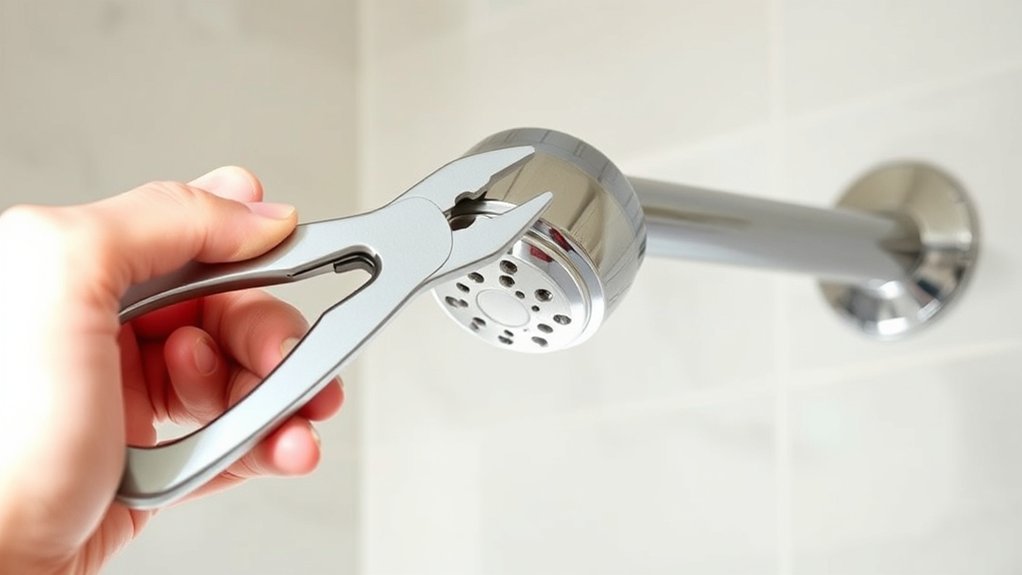
To remove a stuck shower head effectively, you’ll need a few essential tools. Start with adjustable pliers or a pipe wrench, which provide the grip and leverage necessary for most shower head types, including fixed and handheld models.
Use a cloth or rubber pad to protect the fixture’s finish during removal. A wrench or spanner may be required for certain threaded connections. Additionally, keep penetrating oil handy to loosen mineral deposits and corrosion common in older fixtures.
A small brush can help clean threads before attempting removal. Having these tools ready guarantees you can apply the appropriate removal techniques without damaging the shower head or plumbing. Preparing properly streamlines the process and minimizes the risk of costly repairs.
How to Protect Your Shower Head and Fixtures Before Using Pliers
Before you use pliers to remove your shower head, take steps to protect the fixture’s finish from scratches and dents. Shower head protection is vital to maintain the fixture’s appearance and function. Follow these practical steps for effective fixture safeguarding:
Protect your shower head’s finish before using pliers to prevent scratches and maintain its appearance.
- Wrap the shower head’s connection point with a thick layer of painter’s tape or electrical tape to create a protective barrier.
- Place a cloth or rubber padding between the pliers’ jaws and the fixture to prevent metal-on-metal contact and reduce the risk of damage.
- Use adjustable pliers with smooth jaws or cover standard pliers’ jaws with rubber bands for added grip without harming the finish.
These measures guarantee you protect your shower head and surrounding fixtures while applying the necessary force to loosen the connection.
How to Loosen a Stuck Shower Head With Pliers Without Damaging the Shower Arm
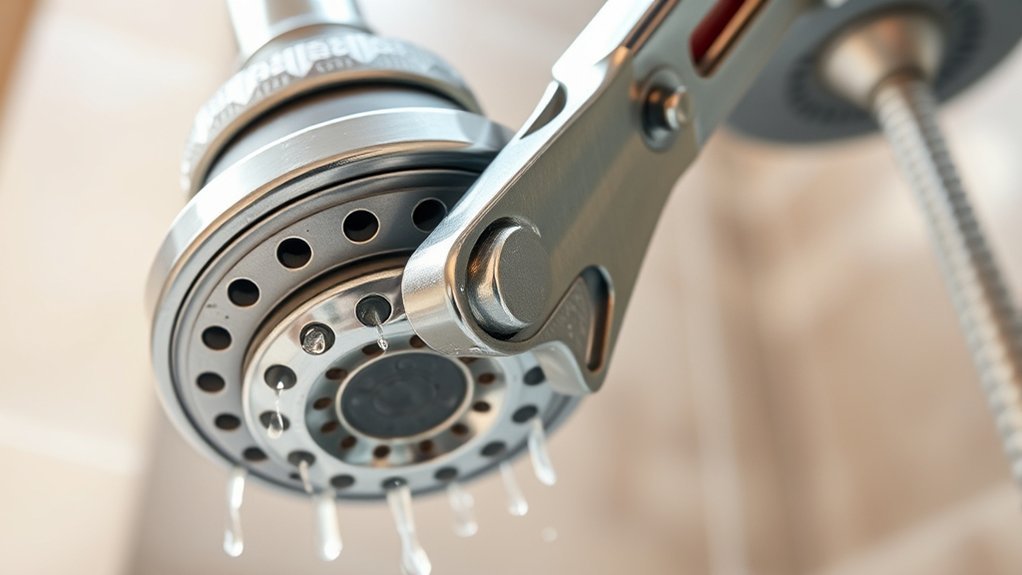
Although stuck shower heads can be frustrating, you can loosen them without damaging the shower arm by using pliers carefully and methodically. First, wrap a cloth or rubber grip around the shower head connection to protect the finish during shower head installation or plumbing maintenance.
Adjust the pliers to fit snugly around the connection nut without squeezing too tightly. Apply steady, controlled pressure, turning counterclockwise to loosen the head. Avoid sudden force or jerky movements, which could bend or crack the shower arm.
If the connection remains tight, pause to reassess rather than increasing pressure. Maintaining a gentle but firm grip guarantees you preserve the integrity of the shower arm threads, preventing costly repairs and facilitating smooth removal for maintenance or replacement.
Using Lubricants to Remove a Stuck Shower Head
When a stuck shower head resists loosening with pliers, applying a lubricant can break down corrosion and mineral buildup obstructing the threads. Choose the right lubrication type, such as penetrating oil, silicone spray, or a water-resistant lubricant.
Follow these application techniques for best results:
- Clean the joint area with a cloth to remove surface dirt and dry it.
- Apply the lubricant generously to the connection, focusing on the threaded area.
- Allow the lubricant to penetrate for 10-15 minutes before attempting to loosen the shower head again.
Using lubricants properly helps reduce friction and dissolves deposits, making removal easier without damaging the shower arm. Repeat the process if necessary to maximize effectiveness before trying mechanical force again.
What to Do If the Shower Head Still Won’t Budge
If the shower head still won’t budge, apply penetrating oil to break down rust and mineral buildup. You can use heat cautiously with a hairdryer to expand the metal and loosen the connection.
If these methods fail, it’s best to call a professional to avoid damaging your plumbing.
Apply Penetrating Oil
Start by applying a penetrating oil designed to loosen rust and mineral deposits that bind the shower head to the pipe. Penetrating oil applications help break down corrosion, making removal easier. Use an effective oil type such as:
- WD-40 Specialist Penetrant – widely recommended for plumbing fixtures.
- Liquid Wrench – known for deep penetration and rust dissolution.
- PB Blaster – strong on stubborn mineral buildup.
Spray the oil generously around the joint where the shower head meets the pipe. Allow it to sit for 10-15 minutes to penetrate effectively. You may need to reapply if corrosion is severe. After soaking, try loosening the shower head with your pliers again. This targeted approach enhances your chances of freeing the stuck fixture without damaging the pipe or shower head.
Use Heat Carefully
After applying penetrating oil and giving it time to work, some shower heads still resist loosening. In this case, controlled heat application can help expand the metal and break the corrosion bond. Use a hairdryer or heat gun on a low setting, directing heat evenly around the joint for 1-2 minutes.
Avoid open flames to prevent damage or injury. Always follow safety precautions: wear heat-resistant gloves, guarantee good ventilation, and keep flammable materials away. Do not overheat, as excessive temperatures can damage plumbing components or seals.
After heating, use pliers to gently attempt loosening the shower head again. If it remains stuck, allow the metal to cool before repeating or reconsider other methods. Heat application requires care to avoid damaging the fixture or causing personal harm.
Seek Professional Help
When repeated attempts and careful techniques don’t free the stuck shower head, it’s time to call in a professional plumber. Professional plumbers have the tools and experience needed to avoid damaging your plumbing. Follow these steps to proceed:
- Contact a licensed plumber for expert advice and an on-site assessment.
- Describe the issue clearly, including any methods you’ve already tried.
- Schedule a service visit to guarantee safe removal without risking leaks or broken fixtures.
Relying on professional plumbers minimizes the risk of costly repairs caused by improper removal. Their expert advice can also guide you on maintenance to prevent future problems. Don’t hesitate to seek help if the shower head remains stuck after your best efforts.
Cleaning and Maintaining Shower Threads to Prevent Future Sticking
You should clean the shower threads regularly to remove mineral deposits and prevent buildup. Applying protective thread tape creates a barrier that reduces corrosion and makes future removal easier.
Avoid letting corrosion accumulate by inspecting and maintaining the threads routinely.
Regular Thread Cleaning
Regular thread cleaning plays an essential role in preventing your shower head from sticking over time. To maintain smooth operation, incorporate regular maintenance and thorough thread inspection into your routine.
Follow these steps for effective cleaning:
- Remove the shower head and examine the threads for mineral buildup, corrosion, or debris.
- Use a soft brush and a vinegar solution to scrub the threads gently, dissolving deposits without damaging the metal.
- Rinse thoroughly and dry the threads before reattaching the shower head to prevent moisture-related corrosion.
Using Protective Thread Tape
Applying protective thread tape creates a reliable barrier that prevents mineral deposits and corrosion from bonding to the threads. For effective thread tape application, first clean the shower arm threads thoroughly to remove any debris or old tape.
Wrap the tape clockwise around the threads, overlapping by 50% to guarantee complete coverage. Use two to three layers for best sealing and protection.
The thread tape benefits include enhanced water-tightness and reduced friction, which make future removal easier. By consistently applying thread tape during installation or maintenance, you maintain thread integrity and minimize sticking issues.
This preventative measure extends the lifespan of your shower head connection and simplifies future disassembly, saving time and effort when you need to remove or replace the fixture.
Avoiding Corrosion Build-Up
Though corrosion can silently damage shower threads over time, routine cleaning and maintenance prevent buildup that leads to stuck fixtures. To guarantee effective corrosion prevention, follow these maintenance tips:
- Regular Cleaning: Wipe threads monthly with a cloth dipped in white vinegar to dissolve mineral deposits and inhibit corrosion.
- Apply Protective Coating: After drying, apply a thin layer of silicone-based lubricant or plumber’s grease to shield threads from moisture and rust.
- Inspect Frequently: Check threads for signs of wear or corrosion every few months, addressing early damage promptly to avoid fixture seizing.
Adopting these steps will maintain smooth thread function and extend your shower head’s lifespan. Consistent corrosion prevention reduces the risk of stuck fittings, saving you time and effort during future maintenance or replacement tasks.
When It’s Time to Call a Pro
If you’ve tried all standard methods and the shower head remains stuck, it’s time to call a professional plumber. Attempting further removal without the right tools or expertise risks damaging the plumbing or fixtures.
Professional plumbing services bring specialized tools and techniques to safely loosen and remove stubborn shower heads. They can also assess any underlying issues like corrosion or thread damage that may be causing the problem.
Professional plumbers use specialized tools to remove stubborn shower heads and diagnose underlying issues like corrosion or thread damage.
Seeking expert advice guarantees the repair is done correctly, preventing leaks or costly repairs later. Don’t hesitate to reach out when DIY efforts fail; the cost of professional intervention often saves time and avoids further damage.
Prioritize safety and efficiency by entrusting stuck shower head removal to qualified plumbers.
Conclusion
Removing a stuck shower head is like untangling a knot—patience and the right tools make all the difference. By protecting your fixtures, applying steady pressure, and using lubricants wisely, you prevent damage and restore flow smoothly.
Think of your shower arm as a delicate thread; treat it with care to avoid stripping or breaking. When all else fails, calling a pro guarantees the problem doesn’t tighten further.
This way, you keep your bathroom running like clockwork and effectively remove a stuck shower head with pliers.