Imagine you’re repairing a bicycle hub and realize you don’t have retaining ring pliers on hand. Removing a retaining ring without pliers might seem challenging, but with the right technique and alternative tools, it’s manageable.
You’ll need to apply precise leverage and understand the ring’s mechanics to avoid damaging it or the assembly.
Let’s explore effective methods to safely and efficiently remove retaining rings under these circumstances.
What Is a Retaining Ring and Why Remove It?
A retaining ring, also known as a circlip, is a fastener designed to hold components or assemblies onto a shaft or inside a housing. Its primary function is to secure parts axially, preventing unwanted movement along the shaft or within a bore.
Understanding retaining ring functions helps you identify when removal is necessary, such as for maintenance, replacement, or assembly adjustments. Removal techniques vary based on ring type—internal or external—and available tools.
Since retaining rings fit tightly in grooves, improper removal risks damage to components or the ring itself. You need to apply controlled force and the right method to safely disengage the ring. Mastering these principles guarantees you preserve mechanical integrity while efficiently handling retaining rings without relying solely on pliers.
Using a Flathead Screwdriver to Remove a Retaining Ring
When removing a retaining ring without pliers, a flathead screwdriver offers a practical alternative by leveraging controlled pressure to disengage the ring from its groove. Position the screwdriver tip carefully, adjusting the screwdriver angle to optimize leverage without damaging the retaining ring or surrounding components.
Different retaining ring types demand specific approaches; for example, external rings require prying outward, while internal rings need inward pressure.
| Retaining Ring Type | Screwdriver Angle | Removal Technique |
|---|---|---|
| External Snap Ring | 30° to 45° | Pry outward gently |
| Internal Snap Ring | 20° to 30° | Push inward carefully |
| Spiral Ring | 15° to 25° | Rotate while levering |
| E-Clip | 25° to 35° | Slide under edge |
| Wave Washer | 10° to 20° | Lift with minimal force |
Alternative Tools for Removing Retaining Rings Without Pliers
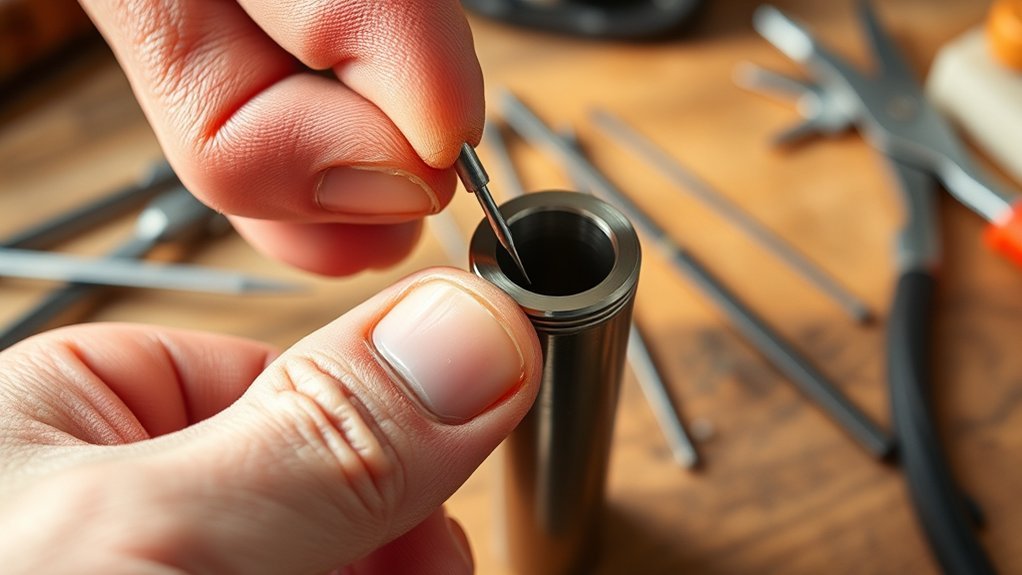
When pliers aren’t available, you can rely on precise screwdriver techniques to carefully pry open the retaining ring’s ends. Needle-nose tweezers offer controlled grip and manipulation, especially in tight spaces where larger tools can’t fit. Both tools require steady hands and attention to avoid damaging the ring or surrounding components.
Screwdriver Techniques
Screwdrivers offer a practical alternative for removing retaining rings without pliers by leveraging their slender, flat tips to carefully pry and manipulate the ring’s edges. Selecting the correct screwdriver type and tip size is critical to avoid damaging the ring or surrounding components.
Smaller rings require precision flat-head screwdrivers, while larger rings may accommodate wider tips without deformation. Apply controlled pressure to disengage the ring from its groove gradually.
| Ring Size (mm) | Recommended Screwdriver Type | Tip Width (mm) |
|---|---|---|
| 10-20 | Precision Flat Head | 1.5 – 2.5 |
| 21-40 | Standard Flat Head | 3.0 – 4.5 |
| 41+ | Wide Flat Head | 5.0+ |
Use incremental leverage to minimize risk and guarantee safe removal.
Needle-Nose Tweezers
Although needle-nose tweezers aren’t the traditional tool for retaining ring removal, they provide a precise grip and fine control for handling small or delicate rings. When using needle nose tweezers to remove a retainer ring, consider these steps:
- Position the tweezers’ tips inside the retainer ring’s groove, ensuring a firm hold without deforming the ring.
- Apply gradual outward pressure to expand the ring slightly, allowing it to disengage from the shaft or housing.
- Carefully lift the retainer ring away, maintaining steady control to avoid dropping or damaging it.
Needle nose tweezers excel in situations where conventional pliers can’t reach or might cause damage, offering a meticulous approach for retainer ring removal in tight or sensitive assemblies.
Using Household Items as Makeshift Tools to Remove Retaining Rings
Because specialized pliers might not always be available, you can rely on common household items to effectively remove retaining rings. Tools such as flathead screwdrivers, small metal files, or even thin butter knives can serve as substitutes.
Select a household tool with a slim, rigid tip that fits into the retaining ring’s groove. Carefully insert the tool under the ring’s edge to gently pry it outward. Apply steady, controlled pressure to avoid deforming the ring or damaging adjacent components.
Precision is essential; avoid excessive force that could cause slippage or injury. Using household tools requires patience and a steady hand but, when executed correctly, these items can provide sufficient leverage to dislodge retaining rings without the need for specialized pliers.
Always prioritize safety and wear protective gloves if possible.
How to Pry Off a Retaining Ring With a Pocket Knife
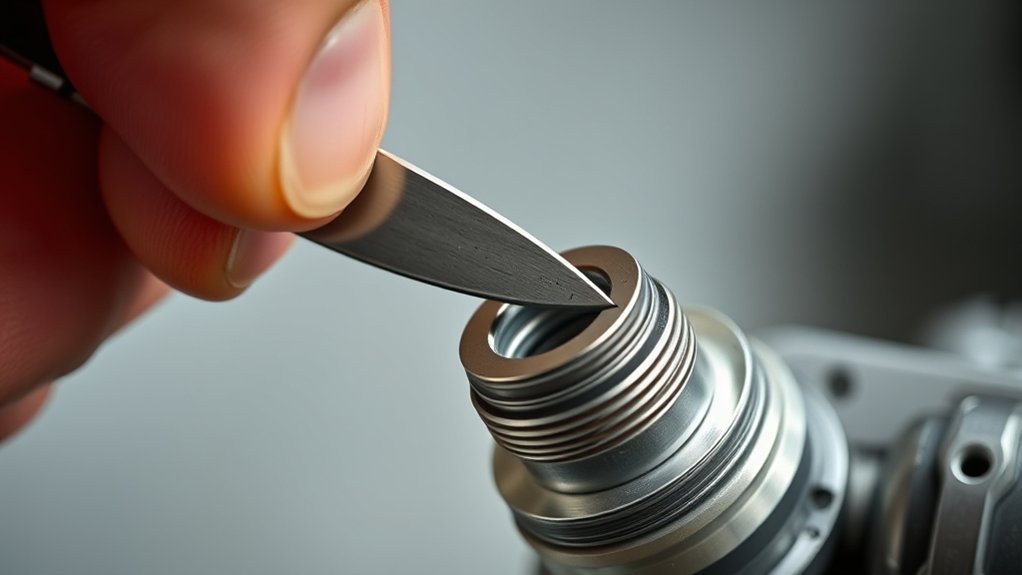
To pry off a retaining ring with a pocket knife, start by choosing one with a sturdy, thin blade that fits into the ring’s groove. Carefully position the blade at the edge without forcing it to avoid slipping or damage.
Then, apply gentle, controlled pressure to lift the ring gradually without deforming it.
Selecting The Right Pocket Knife
Choosing the right pocket knife is essential when prying off a retaining ring without pliers. You need a tool with precise pocket knife features that guarantee control and durability. When selecting knives for this task, focus on the following:
- Blade Thickness and Tip Shape: Opt for a thin, sturdy blade with a pointed tip to effectively wedge under the ring.
- Handle Grip and Ergonomics: Choose a knife with a non-slip grip to maintain firm control during leverage.
- Blade Material and Locking Mechanism: Select high-carbon steel blades for strength and a reliable locking mechanism to prevent accidental closure.
Safely Positioning The Blade
With the right pocket knife selected, you’ll need to position the blade carefully to avoid damaging the retaining ring or surrounding components. Begin by identifying the ring’s gap or notch, which provides a natural leverage point.
Insert the blade tip precisely into this gap, ensuring the blade positioning allows for controlled prying without slipping. Maintain a shallow angle between the blade and the ring to minimize stress on the metal.
Throughout this process, adhere strictly to safety precautions: secure the workpiece firmly to prevent movement, and keep your fingers clear of the blade’s path. Proper blade positioning combined with vigilant safety precautions will reduce the risk of injury and preserve the integrity of the retaining ring and adjacent parts.
Applying Gentle Pressure
One key step in removing a retaining ring without pliers involves applying gentle, steady pressure to pry it off. To do this effectively, maintain a gentle grip on the pocket knife handle and guarantee your steady hands prevent sudden slips.
Follow these steps:
- Insert the knife tip beneath the retaining ring’s edge with controlled force.
- Apply upward pressure gradually, avoiding excessive force that may deform the ring or damage surrounding components.
- Rotate the knife slightly if needed to increase leverage, maintaining a consistent angle.
Tips to Avoid Damage When Removing Retaining Rings
Although removing retaining rings without pliers can be challenging, taking precautions will help you avoid damaging the ring or the surrounding components. First, understand the retaining ring materials; brittle metals require more delicate handling to prevent fractures. Use tools with fine, pointed edges to reduce pressure points and minimize deformation.
Secure the workpiece firmly to avoid sudden movements that cause tool slips. Always maintain a controlled grip and apply steady, even force to disengage the ring from its groove. Avoid excessive twisting or prying, which can distort the ring or damage the shaft.
Inspect the ring and groove before removal for any signs of wear or stress, allowing you to adjust your technique accordingly. These strategies enhance safety and preserve component integrity during removal.
What to Do If the Retaining Ring Is Stuck or Rusted?
When a retaining ring is stuck or rusted, you’ll need to apply targeted techniques to loosen it without causing damage. Rust removal is essential to free stuck mechanisms effectively. Follow these steps:
- Apply a penetrating lubricant: Use a rust remover or penetrating oil to infiltrate the ring’s crevices. Let it sit for 10-15 minutes to break down corrosion.
- Gently tap the ring: Use a small hammer or screwdriver handle to lightly tap around the ring’s edge, promoting rust loosening without deforming it.
- Use a flat tool for leverage: Insert a flathead screwdriver or similar tool into the ring’s gap and carefully pry it open incrementally.
These methods focus on precision and controlled force to prevent damage while addressing rust and stuck mechanisms efficiently.
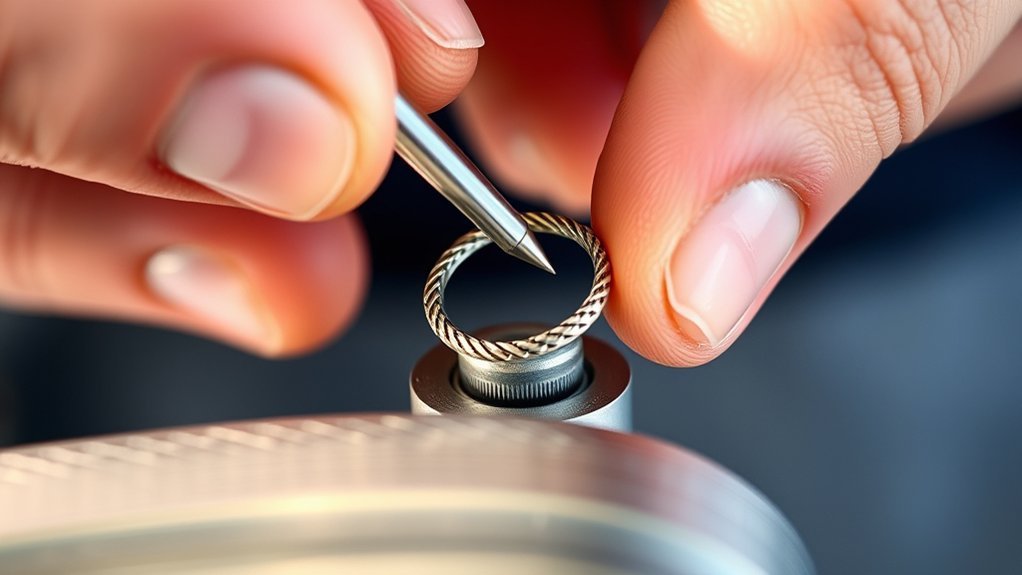
How to Remove Retaining Rings With Needle-Nose Tweezers or Small Pliers
Use needle-nose tweezers or small pliers to carefully grip the retaining ring’s edges for controlled removal. Start by positioning the tips of your tool on opposite sides of the ring’s opening, applying gentle, steady pressure.
Employ tweezers techniques that emphasize precision and minimal distortion to avoid damaging the ring or surrounding components. Small pliers offer improved leverage, allowing you to expand or compress the ring slightly if needed.
Maintain a firm grip, then slowly rotate or lift the ring off its groove. Throughout the process, keep your movements deliberate to prevent slipping or sudden release.
How to Safely Reinstall or Replace a Retaining Ring After Removal
After removing a retaining ring, you’ll want to guarantee its secure and correct reinstallation or replacement to maintain the integrity of the assembly. Proper retaining ring installation prevents mechanical failure and guarantees peak component function.
Follow these steps for effective replacement techniques:
- Inspect the retaining ring for deformation or wear; replace if compromised to avoid malfunction.
- Align the ring carefully within the groove, guaranteeing it sits flush without distortion.
- Use appropriate tools or manual methods to expand or compress the ring evenly, avoiding overextension or damage.
Conclusion
Removing a retaining ring without pliers might seem like traversing a tightrope, but with the right tools and steady hands, you can master it with precision. Whether you use a flathead screwdriver or household items, applying careful leverage and patience keeps the ring’s integrity intact.
Remember, controlled pressure and the right angle are your allies—turning a tricky task into a smooth, mechanical dance without distortion or damage. With practice, removing a retaining ring without pliers becomes a manageable and efficient process.