A broken necklace chain is like a paused melody, waiting to be restored. Fixing a broken necklace chain without pliers may seem tricky at first, but with the right approach, you can carefully realign and reconnect the links using simple household tools.
Before you give up or rush to a jeweler, consider a few precise steps that can bring your necklace back to life—steps that rely more on patience and technique than specialized equipment.
With a little care and attention, you can have your necklace looking as good as new in no time.
Quick Ways to Fix a Broken Necklace Chain Without Pliers
Although pliers are the usual tool for fixing a broken necklace chain, you can quickly repair it without them by using household items. For DIY jewelry enthusiasts, creative repairs start with simple tools like a pair of tweezers, a needle, or even a paperclip.
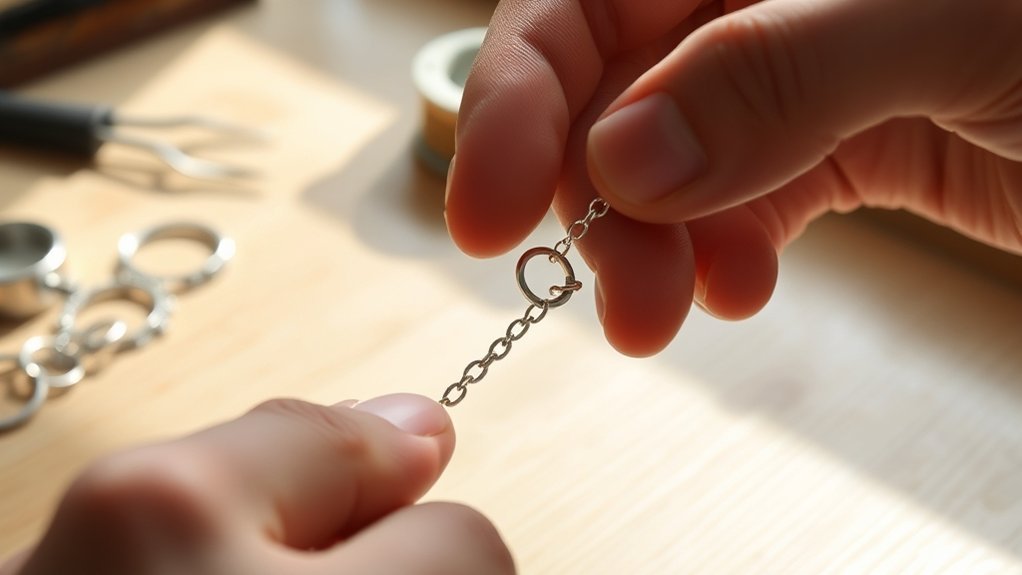
First, gently align the broken chain links. Use a needle or pin to carefully open and close the link, emulating the action of pliers. If a paperclip is handy, straighten and shape it to act as a makeshift clasp or connector.
This method requires patience and steady hands, but it’s effective for minor breaks. By applying these precise and methodical techniques, you maintain your necklace’s integrity without professional tools, making quick, efficient DIY jewelry repairs accessible.
Find and Check Where Your Necklace Broke
Start by locating the exact point where your necklace chain broke. Carefully inspect the surrounding links for any bends, cracks, or missing pieces.
Identifying the type of damage will help you determine the best repair method.
Locate The Break Point
Someone who owns a broken necklace chain knows the importance of pinpointing the exact break point before attempting any repair. Start by gently laying your necklace on a flat, well-lit surface.
Examine the chain materials closely, as different metals and weaves show breaks differently. Locate the compromised link or joint, the critical area for effective break prevention in future wear.
Use the table below to guide your inspection focus:
| Chain Material | Common Break Points | Break Prevention Tip |
|---|---|---|
| Gold | Solder joints, thin links | Avoid tugging, store flat |
| Silver | Clasp area, link bends | Regular cleaning |
| Stainless Steel | Weld seams, link ends | Proper sizing |
| Nylon/Thread | Knot loosening, fraying | Avoid water exposure |
This methodical approach guarantees you accurately find where to fix without guesswork.
Inspect Chain Links
After pinpointing the break point on your necklace, closely inspect the surrounding chain links for any signs of damage or weakness. Examine each link’s shape and connection, noting any that are bent, twisted, or partially open.
Different link types, such as cable, curb, or rope, may require specific attention, as their construction affects how they hold together. Consider the chain materials, too; softer metals like gold or silver can deform more easily than stainless steel or titanium.
Use a bright light and, if possible, a magnifying glass to enhance your inspection. Identifying subtle defects near the break helps you understand how to proceed with repair and avoid further damage. This careful evaluation guarantees your necklace regains its original strength and appearance.
Identify Damage Type
When you locate the break in your necklace, carefully identify the exact type of damage to determine the appropriate repair method. Examine the chain materials closely, whether it’s gold, silver, or a base metal, since each responds differently to repair techniques.
Look for common types of damage such as a clean snap, bent links, or stretched sections. A clean break might need simple reattachment, while bent or misshapen links require reshaping before reconnecting.
Also, assess if the clasp or jump ring is damaged, as these often cause chain failure. By accurately identifying the damage type and understanding your necklace’s chain materials, you can choose the most effective repair approach without risking further harm.
This targeted assessment guarantees your necklace regains its original strength and appearance.
Gather Household Items to Repair Your Necklace
Before you start fixing your broken necklace chain, gather a few essential household items to guarantee a smooth repair process. You’ll need a small bowl of warm water to clean the chain, a soft cloth for drying, and a magnifying glass to closely inspect the damaged link.
Additionally, have a pair of tweezers or a toothpick ready to manipulate tiny chain links. For securing the chain temporarily, a piece of clear tape or a small rubber band can be useful.
If you don’t have pliers, a sturdy needle or sewing pin can help in bending or aligning links. Collecting these household items assures you’re well-prepared for effective necklace repair without specialized tools, minimizing frustration and increasing success chances.
Fix the Broken Chain Link by Hand
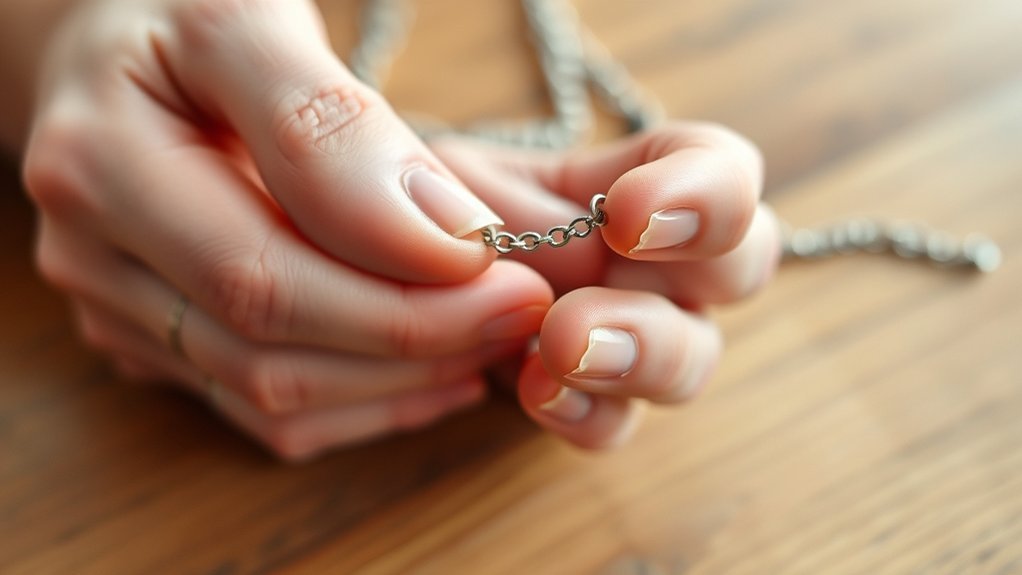
Though it may seem delicate, you can carefully repair the broken chain link by hand using your gathered tools. Start by aligning the broken ends of the chain link as precisely as possible.
Using your fingers or a small, sturdy object like a toothpick, gently push the ends together, closing the gap. Employ hand repair techniques such as slight twisting motions to guarantee the link closes securely without damaging the metal.
If the chain material is soft, apply minimal pressure to avoid bending it out of shape. These chain repair methods demand patience and steady hands, but they can restore the link’s integrity effectively.
Work in a well-lit area to maintain precision, and verify the link’s strength by lightly tugging once you finish.
Secure a Broken Chain With Thread or Wire
If the chain link is too damaged to repair by hand, securing the break with thread or wire provides a reliable alternative. Start by selecting a strong, thin thread or fine gauge wire that matches the necklace’s color for a discreet fix.
Using precise thread techniques, wrap the thread tightly around the broken ends multiple times, ensuring a secure hold. Tie a firm knot and trim excess thread close to the knot.
For wire methods, thread the wire through the broken links and twist tightly with your fingers to close the gap, then trim any excess. Both methods require steady hands and patience to maintain chain alignment.
These techniques restore functionality without tools, extending the necklace’s life until professional repair is possible.
Fix a Necklace Clasp Without Pliers
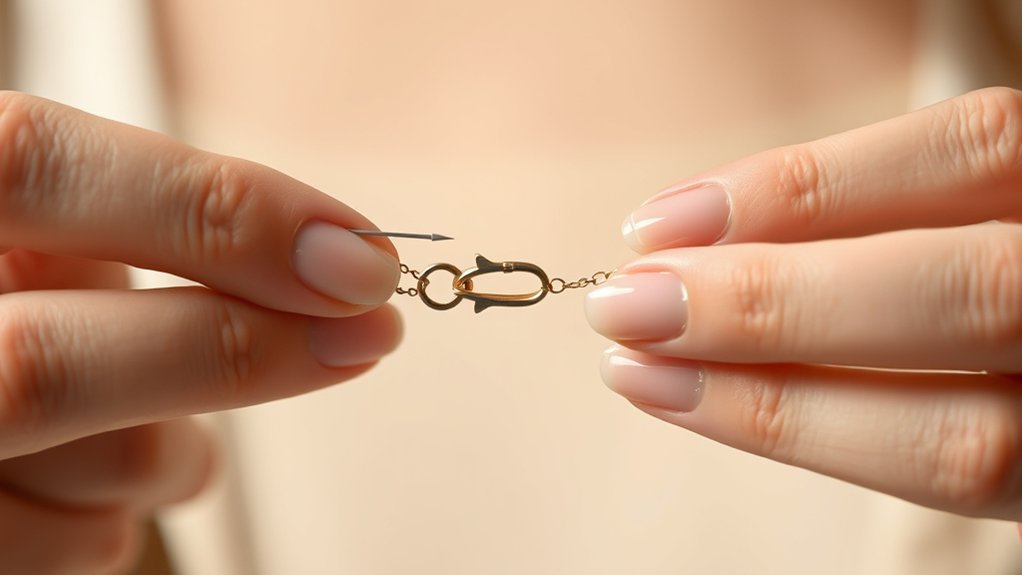
If you don’t have pliers on hand, you can use small tools like tweezers or flathead screwdrivers to adjust your necklace clasp carefully. You’ll want to apply steady, gentle pressure to realign or close the clasp without damaging it.
For a quick fix, consider using a small jump ring or a paperclip to create a temporary clasp until you can make a permanent repair.
Alternative Clasp Repair Tools
Several practical tools can help you fix a necklace clasp without using pliers, making the repair process accessible even if you lack specialized jewelry equipment. By choosing appropriate clasp alternatives and repair materials, you can efficiently restore your necklace.
Common household items like tweezers, needle-nose tweezers, small flathead screwdrivers, and even sewing needles provide the necessary grip and control for clasp adjustments.
| Tool | Purpose |
|---|---|
| Tweezers | Gripping small parts precisely |
| Needle-nose tweezers | Bending and holding wire segments |
| Small flathead screwdriver | Leveraging open jump rings |
| Sewing needle | Manipulating tiny clasp components |
Selecting these tools lets you handle delicate repairs without damaging the necklace, ensuring a professional finish using readily available materials.
Manual Clasp Adjustment Tips
How can you adjust a necklace clasp without relying on pliers? Start by using manual clasp techniques that focus on gentle pressure. Hold the clasp firmly between your thumb and forefinger, then carefully open or close the jump ring connecting the clasp.
You can use a sturdy, flat surface to help steady the piece during adjustment. For clasp adjustment methods, consider employing household items like a toothpick or the edge of a butter knife to nudge the clasp’s components without damaging the metal.
Always work slowly to avoid bending the metal out of shape. These manual methods give you precise control over the clasp, allowing you to realign or tighten it effectively without needing specialized tools.
Temporary Clasp Fix Ideas
Where can you find quick solutions when a necklace clasp breaks and you don’t have pliers on hand? Start by exploring temporary clasp solutions using everyday items. For example, you can use a small paperclip or a thin safety pin as a DIY clasp alternative.
Simply open the paperclip slightly and hook it through the necklace loop to secure it temporarily. Another effective method is tying a small knot near the broken clasp area if the chain material allows.
You can also use a tiny jump ring from an old piece of jewelry or purchase inexpensive ones; these can be opened carefully with your fingers and clipped in place. These temporary clasp solutions provide immediate functionality until you can perform a proper repair with appropriate tools.
Strengthen Your Necklace Repair to Prevent Future Breaks
Although repairing the necklace chain restores its function, reinforcing the repair guarantees it withstands daily wear. To strengthen your necklace repair and apply effective preventative measures, follow these steps:
- Use a small drop of clear-drying adhesive on the repaired link to secure it without adding bulk.
- Gently press the link closed with your fingers or a soft tool to verify a tight fit.
- Inspect surrounding links for any signs of weakness and reinforce as needed.
- Avoid exposing the chain to excessive pulling or snagging, which can weaken repairs.
Know When to Seek Professional Help and How to Maintain Your Necklace
When your necklace shows signs of complex damage or delicate components, you should seek professional help to guarantee a proper repair. Attempting fixes beyond your skill level can worsen the issue. Professional assistance guarantees precise restoration and preserves the necklace’s integrity.
Proper necklace maintenance prevents future damage. Regularly check clasps and links for wear, avoid exposure to harsh chemicals, and store your necklace safely.
| Aspect | Action | Frequency |
|---|---|---|
| Inspection | Check for weak links or clasp | Monthly |
| Cleaning | Use gentle cleaner | Quarterly |
| Storage | Use soft pouch or jewelry box | Always |
Conclusion
Now that you’ve carefully aligned the tiny links and secured them without pliers, imagine your necklace resting smoothly against your skin, whole again. With steady hands and simple household tools, you’ve brought it back to life.
Remember, patience is your best ally—each gentle twist and careful thread strengthens your repair. Keep your necklace shining by handling it with care.
If the repair feels too delicate or complicated, don’t hesitate to seek professional help to preserve its delicate beauty. Following these steps ensures you can confidently fix a broken necklace chain without pliers and enjoy wearing it once more.