If you’ve ever wanted to put eyelets on fabric with pliers but weren’t sure where to start, using pliers is a straightforward method that anyone can master.
You’ll need the right tools and a bit of patience to get clean, secure eyelets that hold up well.
Once you understand the steps and techniques involved, you’ll be able to enhance your sewing projects with a professional finish.
Let’s take a closer look at what you’ll need and how to begin.
Tools Needed to Put Eyelets on Fabric
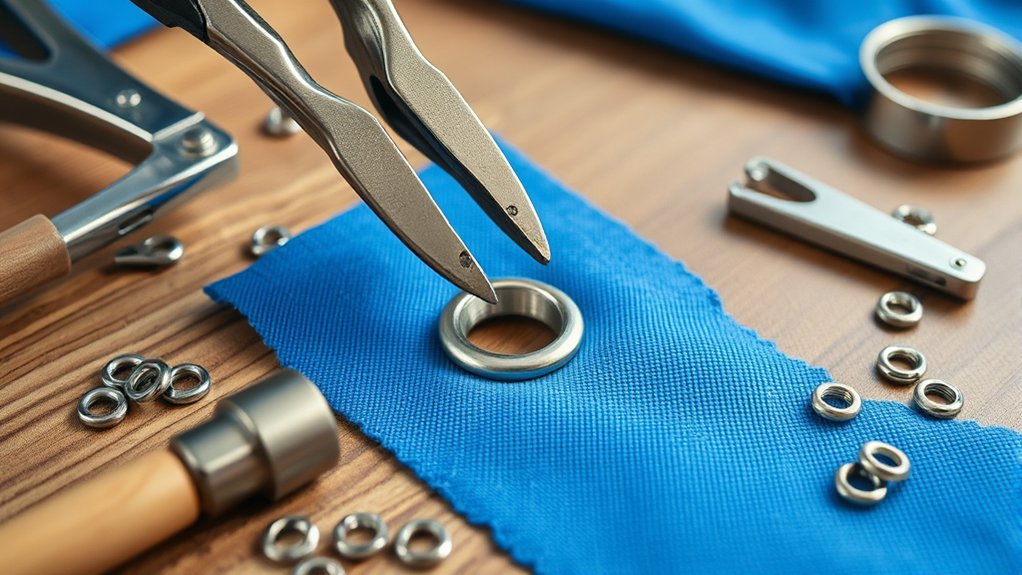
Before you start putting eyelets on fabric, gather the right tools to make the process smooth and accurate. First, familiarize yourself with different eyelet types. Metal and plastic are common, so choose based on your project’s needs.
Next, select the appropriate plier types. Regular eyelet pliers work well for most fabrics, but if you’re working with thicker materials, heavy-duty pliers provide better leverage. You’ll also need a hole punch tool to create precise openings for the eyelets.
Don’t forget a sturdy surface to work on, like a cutting mat or wooden block. Having these tools ready guarantees you can set eyelets securely and neatly, making your fabric project look professional and durable. Ready your supplies, and you’ll find the process much easier and enjoyable.
Choosing the Right Eyelets for Your Fabric
Once you have your tools ready, the next step is picking eyelets that suit your fabric and project. You’ll find different eyelet types such as metal, plastic, and brass, each offering unique durability and aesthetic qualities.
Consider your fabric’s thickness and purpose when choosing. Color options also matter—they can either blend in or stand out as a design feature. Here’s a quick guide:
| Eyelet Type | Best For |
|---|---|
| Metal | Heavy fabrics, durability |
| Plastic | Light fabrics, flexibility |
| Brass | Decorative, rust-resistant |
Selecting the right eyelet guarantees a secure fit and enhances your fabric’s look. Don’t hesitate to experiment with color options to match your project’s style perfectly.
Preparing Fabric for Eyelets
Start by marking the exact spots where you want to place your eyelets. Proper fabric preparation guarantees your eyelets sit securely and look professional.
First, lay your fabric flat on a sturdy surface, smoothing out any wrinkles or folds. This helps maintain accurate eyelet alignment, preventing uneven spacing or crooked placement.
Use a ruler or measuring tape to double-check distances between markings, so your eyelets line up perfectly.
If your fabric is lightweight or delicate, consider reinforcing it with an interfacing patch behind each marked spot to prevent tearing.
Taking these steps during fabric preparation sets you up for success when inserting eyelets. With careful planning and precise alignment, your finished project will be both durable and visually appealing.
Marking and Punching Fabric Holes for Eyelets
Start by choosing exactly where you want your eyelets to go, making sure the placement suits your project.
Next, measure the size of the hole needed to fit your eyelets snugly without damaging the fabric.
Finally, use a fabric punch tool to create clean, precise holes that will hold the eyelets securely.
Choosing Eyelet Placement
Choosing the right spot for your eyelets is essential for both function and appearance. Start by examining your fabric design to guarantee the eyelets enhance rather than disrupt it. Use eyelet patterns as a guide to evenly space holes, maintaining symmetry and balance.
Mark the fabric lightly with a pencil or tailor’s chalk where each eyelet will go, double-checking alignment before punching holes. Keep in mind the fabric’s stretch and thickness to avoid placing eyelets too close to edges or seams, which can weaken the material.
Taking your time with placement guarantees that your finished project looks professional and functions well. By carefully planning eyelet placement, you’ll make your fabric both attractive and durable, setting you up for success in the next steps.
Measuring Hole Size
Once you’ve marked where each eyelet will sit, the next step is to measure the hole size accurately. To do this, check the eyelet sizing on your package or guide. Each eyelet has a recommended hole diameter.
Use a ruler or caliper to guarantee your fabric hole matches this size precisely. Too small, and the eyelet won’t fit; too large, and it won’t hold securely.
When measuring, remember the hole diameter should be just enough for the eyelet’s barrel to slide through without forcing. Taking time here avoids frustration later and guarantees your eyelets sit perfectly.
Accurate hole sizing is key to a professional finish, so double-check your measurements before making any cuts in the fabric.
Using Fabric Punch Tools
Using fabric punch tools guarantees clean, precise holes for your eyelets without damaging the surrounding material. First, mark your fabric where each eyelet will go, using a fabric pen or chalk. This assures accuracy and aligns with eyelet installation tips.
Next, select the correct size punch bit matching your eyelet’s diameter. Position the fabric between the punch tool’s base and the punch head, aligning it with your marks. Apply firm, steady pressure to create a neat hole.
Fabric punch techniques like this prevent fraying and make installation easier. Remember, practice on scrap fabric to build confidence before working on your project.
With these steps, you’ll create perfect holes every time, making your eyelet installation smooth and professional-looking.
Step-by-Step Guide to Setting Eyelets With Pliers
Start by preparing your fabric and eyelets carefully to guarantee a smooth process. Next, align the eyelets correctly in the punched holes for a clean finish.
Finally, use your pliers to secure the eyelets firmly in place, giving your project a professional touch.
Preparing Fabric and Eyelets
Before setting your eyelets, you’ll want to prepare both your fabric and the eyelets carefully to guarantee a secure fit. Start by selecting eyelet types that best suit your project, considering size, material, and finish.
Make certain the eyelets are compatible with your fabric; lightweight fabrics need smaller, delicate eyelets, while heavier fabrics require sturdier ones to prevent tearing. Next, mark the spots where you’ll place the eyelets, ensuring even spacing.
Use a sharp tool or punch to create clean holes just big enough for the eyelets to fit snugly. Preparing your fabric properly helps avoid fraying and guarantees the eyelets hold firmly. Taking these steps sets a solid foundation for a professional-looking, durable finish every time.
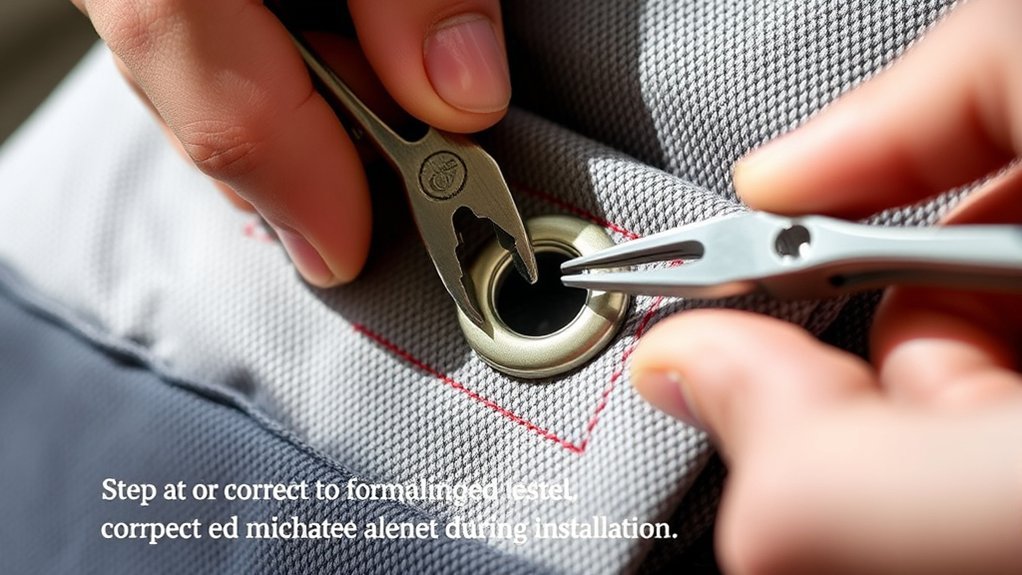
Aligning Eyelets Correctly
Once your fabric is marked and the holes are cleanly punched, you’ll want to focus on aligning the eyelets perfectly for a neat finish. Start by placing the eyelet’s front piece on the fabric’s right side, guaranteeing the hole centers precisely over the punched spot.
Use eyelet alignment techniques like holding both pieces together briefly to check fit before securing. Keep fabric tension considerations in mind; the fabric should lie flat without stretching or puckering, which can distort the eyelet placement.
If the fabric shifts, adjust it carefully to maintain smooth tension. Taking these steps guarantees your eyelets sit evenly, enhancing both appearance and durability.
This careful alignment sets you up for success in the next phase of securing the eyelets with pliers.
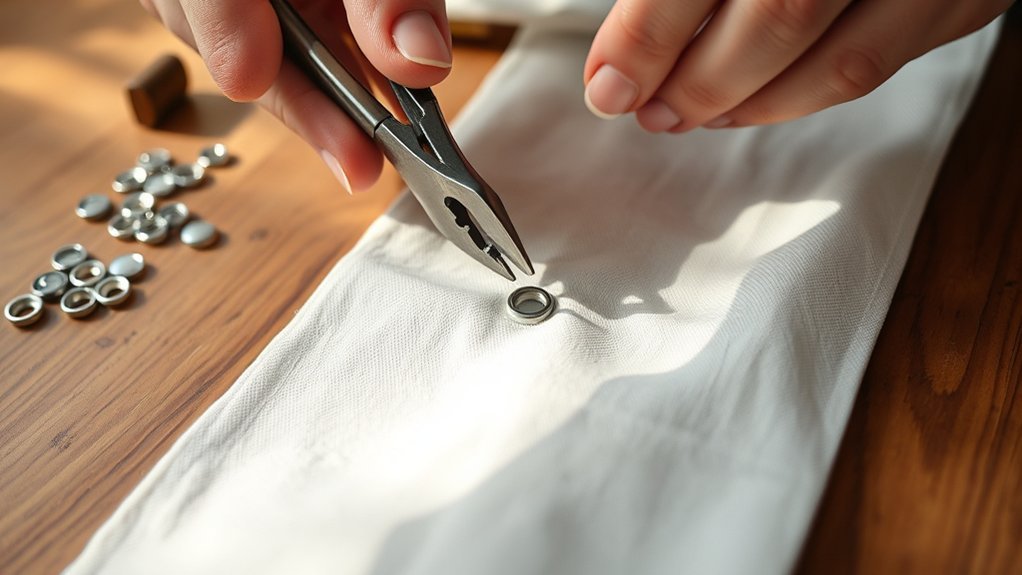
Using Pliers to Secure
Grab your pliers and get ready to secure the eyelets firmly in place. First, choose the right eyelet type for your fabric thickness. Insert the eyelet through the hole you made, ensuring it’s flush with the fabric.
Position the washer on the back side. Now, use your pliers to grip the eyelet’s base gently but firmly. Apply steady pressure while squeezing to flare out the eyelet’s edges, locking it securely.
Different plier techniques may suit various eyelet types, so adjust your grip and pressure accordingly to avoid damaging the fabric or eyelet. Practice on scrap fabric first to perfect your technique.
With patience and the right approach, you’ll have neat, durable eyelets that enhance your project’s look and function.
Tips for Secure, Neat Eyelet Installation
Although installing eyelets might seem straightforward, ensuring they are secure and neat requires careful attention to detail. First, select the right eyelet types for your fabric; lightweight fabrics need smaller, thinner eyelets, while heavy fabrics require larger, sturdier ones. Match eyelets to fabric compatibility to avoid damage or loose fittings.
Before punching holes, mark precise spots and cut fabric cleanly to prevent fraying. When using pliers, apply even pressure to avoid bending or misaligning eyelets.
After setting, check both sides to confirm the eyelet is flush and firmly attached. Taking these steps helps you achieve professional-looking results that last, making your project both functional and visually appealing. Keep practicing, and you’ll master eyelet installation in no time!
Fixing Common Eyelet Installation Problems
Even with careful preparation and technique, you might run into some common eyelet installation issues like crooked eyelets, fabric damage, or loose fittings. To fix crooked eyelets, gently pry them open with pliers and reposition before pressing again.
Avoid fabric damage by reinforcing the area with interfacing or a patch if the hole tears. Loose fittings often result from using the wrong eyelet size or insufficient pressure; guarantee you match eyelets to fabric thickness and apply firm, even force with your pliers.
These common mistakes can stall your project, but with quick troubleshooting tips like double-checking measurements and practicing on scrap fabric, you’ll get smooth, secure results every time. Don’t get discouraged; fixing these issues sharpens your skills and improves your final product.
Creative Sewing Projects Enhanced by Eyelets
When you add eyelets to your sewing projects, you open up a world of creative possibilities. Eyelet embellishments not only strengthen your fabric but also add stylish details to fabric accessories like bags, belts, and curtains. You can create functional openings for laces or simply decorative patterns.
Here’s a quick guide to inspire your next project:
| Project Type | Use of Eyelets | Benefits |
|---|---|---|
| Tote Bags | Reinforce handles | Adds durability and style |
| Belts | Functional holes | Adjustable fit |
| Curtains | Decorative accents | Easy hanging |
Experiment with different sizes and colors of eyelets to truly personalize your fabric accessories. You’ll find that eyelets bring both form and function to your creative sewing.
Keeping Your Pliers and Eyelets in Good Shape
To keep your pliers and eyelets in top condition, you’ll need to clean and store them properly after each use. Start by wiping your pliers with a dry cloth to remove any fabric fibers or dust. For stubborn dirt, use a small brush and mild soap, then dry thoroughly to prevent rust.
Store your pliers in a dry place, ideally in a protective case or pouch to avoid damage. As for eyelets, keep them in a sealed container to prevent moisture exposure and loss. Regular maintenance tips include checking your pliers’ jaws for alignment and applying a drop of oil to the pivot joint for smooth operation.
Following these simple plier care steps will extend their lifespan and guarantee your eyelets stay ready for your next project.
Best Places to Buy Eyelets and Pliers
Although eyelets and pliers might seem like simple tools, choosing the right place to buy them can make a big difference in quality and price. You’ll want to explore the best online stores that specialize in sewing supplies. They often offer a wide variety of eyelets and durable pliers at competitive prices.
Plus, online reviews can guide you toward trusted brands. Don’t overlook your local craft shops either; they provide the advantage of seeing and feeling the tools before you buy. Local craft stores also let you ask questions and get personalized advice, which can be really helpful if you’re new to using eyelets.
Combining online convenience with local expertise guarantees you get the best tools for your fabric projects.
Conclusion
Now that you’ve mastered putting eyelets on fabric with pliers, you hold the key to adding a polished sparkle to any project. Like a craftsman shaping metal, your careful touch transforms plain fabric into something sturdy and stylish.
Keep practicing, and soon eyelets will pop into place with ease, giving your creations that professional edge. So grab your pliers, trust your hands, and watch your sewing projects come alive with flair!
With these skills, putting eyelets on fabric with pliers will become second nature, elevating every piece you create.